How to Export Orders from Shopify (2026 Guide)
Follow these steps to export your Shopify orders as a CSV file. Once exported, you can use any of our converter tools to transform the data for your target system.
Export Steps
Log in to your Shopify admin
Open your browser and go to your Shopify admin panel at your-store.myshopify.com/admin. Enter your credentials to sign in. You need to have at least the Orders permission to access the export feature.
Navigate to the Orders page
From the left-hand sidebar in your Shopify admin, click on Orders. This opens the full list of your store's orders sorted by most recent. You will see the Export button in the upper-right area of the page.

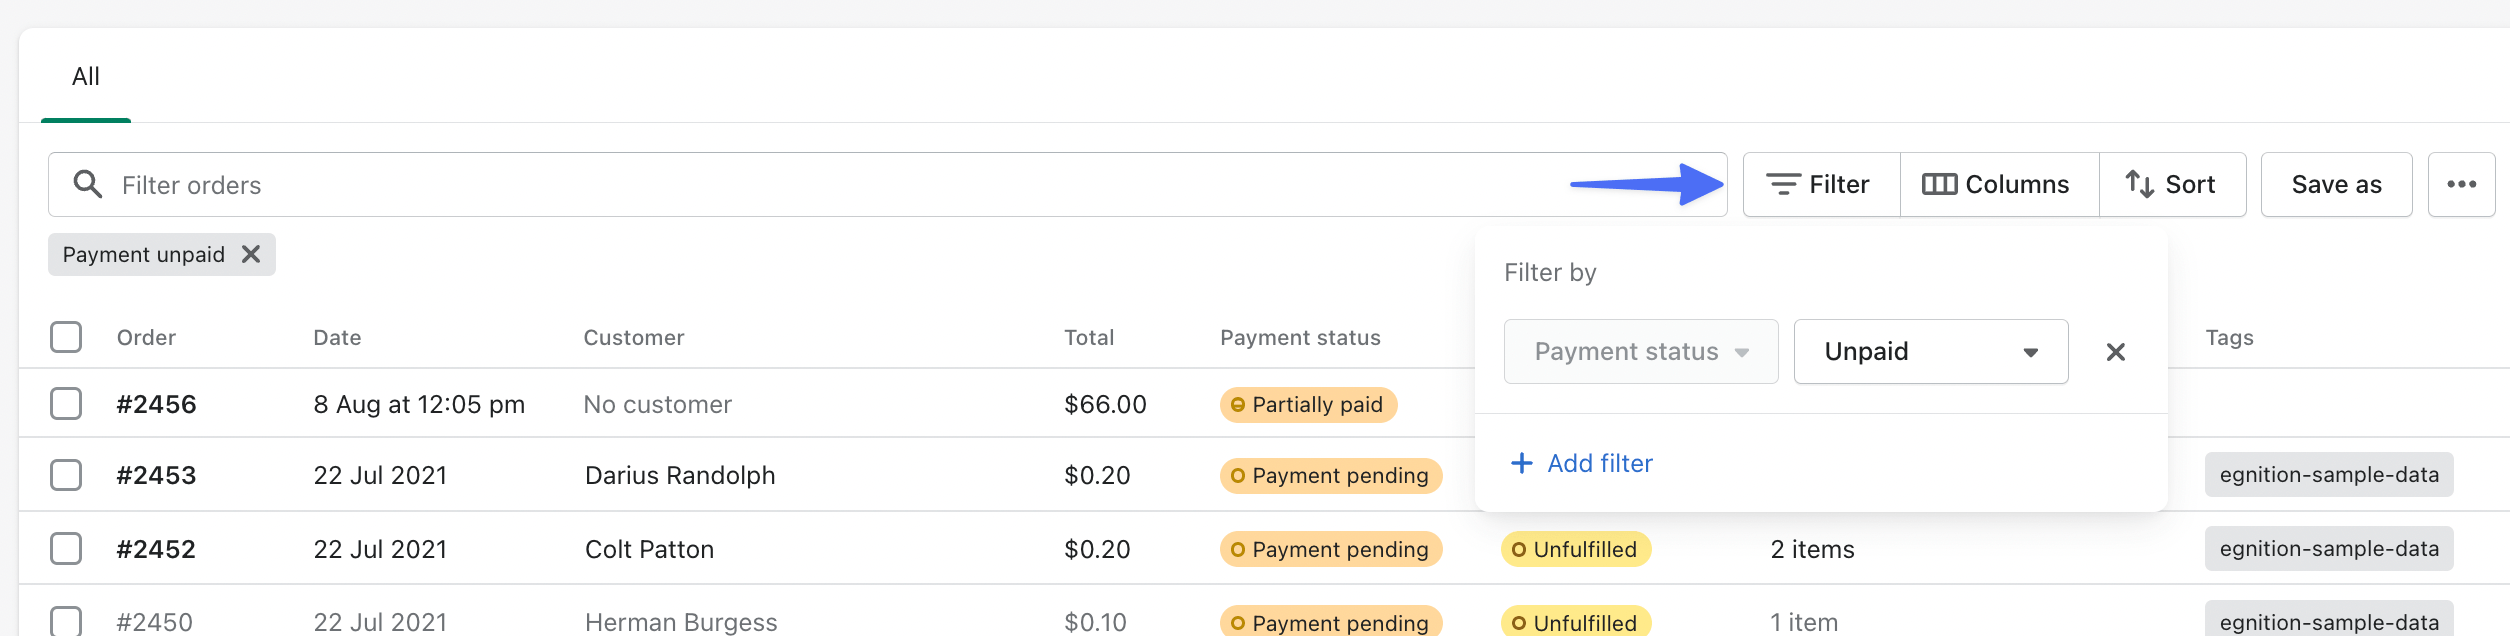
Apply filters to narrow your export (optional)
If you only need a subset of orders, use the filter bar at the top of the orders list before exporting. You can filter by date range, fulfillment status, payment status, sales channel, and more. Only the filtered orders will be included when you select the matching export option.
Click Export and choose your export scope
Click the Export button to open the export dialog. You will see several scope options: export the current page of orders, all orders matching your filters, all orders in your store, or orders by date range. Select the option that fits your needs.
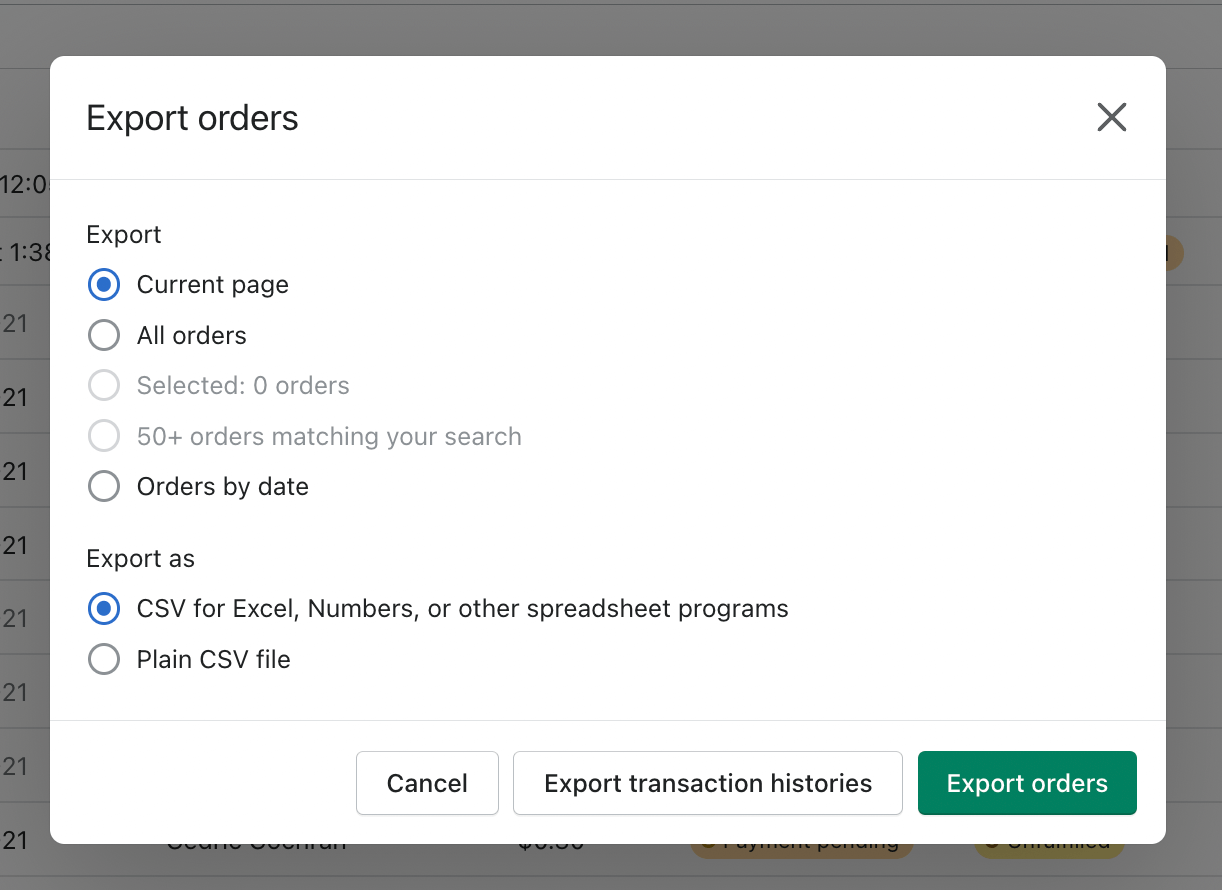
Select CSV file format
Under the 'Export as' section in the dialog, choose 'CSV for Excel, Numbers, or other spreadsheet programs' if you plan to open the file in a spreadsheet app. Choose 'Plain CSV file' if you intend to import it into another system or database. The spreadsheet-friendly format includes a BOM header for better compatibility with Excel.
Choose 'Export orders' (not transaction histories)
The dialog offers two export actions: 'Export orders' and 'Export transaction histories'. Click 'Export orders' to get the full order data with line items, customer information, shipping addresses, and financial details. The transaction histories option exports Shopify Payments data instead, which is a different dataset.
Download or check your email for the file
If your export contains 50 or fewer orders, the CSV file will download directly to your browser. For larger exports, Shopify processes the file in the background and emails a download link to the store owner's email address. The email typically arrives within a few minutes but may take longer for very large datasets.
Open and review the CSV file
Open the downloaded CSV file in your spreadsheet application. Verify that the data looks correct: each row represents a single line item, so multi-item orders will span multiple rows. The first row of each order group contains the order-level details (totals, customer info, addresses), while subsequent rows for the same order contain only the line item fields.
Required Orders Fields
| Field | Type | Description | Example |
|---|---|---|---|
| Name | Text | Order number/ID (e.g., #1001) | #1001 |
| Created at | Date/Time | Order creation date/time (ISO 8601) | 2025-01-15T10:30:00-05:00 |
| Total | Currency | Order total amount | 149.99 |
| Subtotal | Currency | Subtotal before shipping and tax | 129.99 |
| Billing Name | Text | Customer billing name | John Smith |
| Lineitem name | Text | Product name (line item) | Widget Pro |
| Lineitem quantity | Number | Quantity ordered | 1 |
| Lineitem price | Currency | Unit price | 129.99 |
Your Shopify export must include these fields for successful conversion.