How to Import Invoice to Xero (2026 Guide)
After converting your data with one of our tools, follow these steps to import the invoice into Xero.
Import Steps
Navigate to the Invoices page
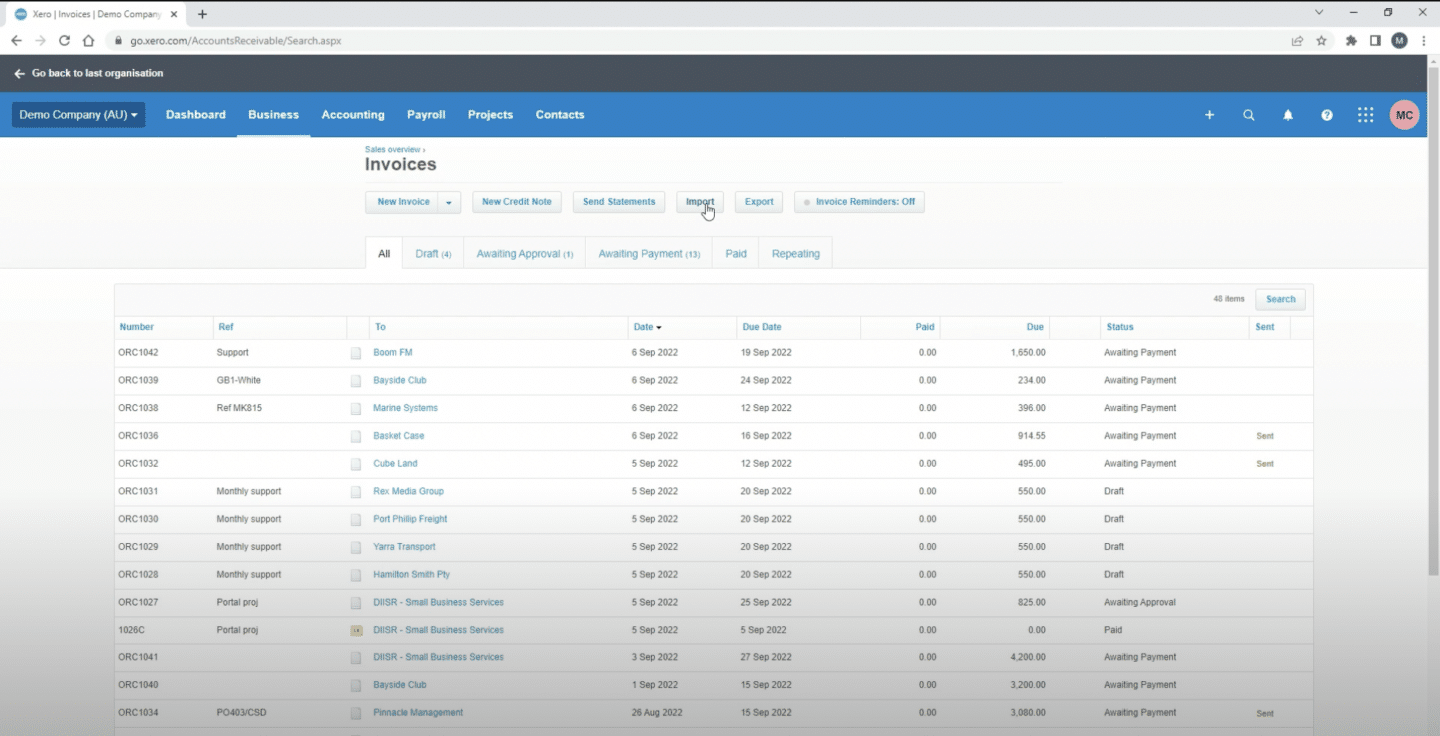
Log in to your Xero account and click the Business menu in the top navigation bar. Select Invoices from the dropdown to open the Sales Overview page where you can see all your existing invoices organized by status.
Open the invoice import screen
On the Invoices page, click the Import button located near the top of the page. This opens the invoice import wizard which guides you through the upload process step by step.
Download the Xero invoice template
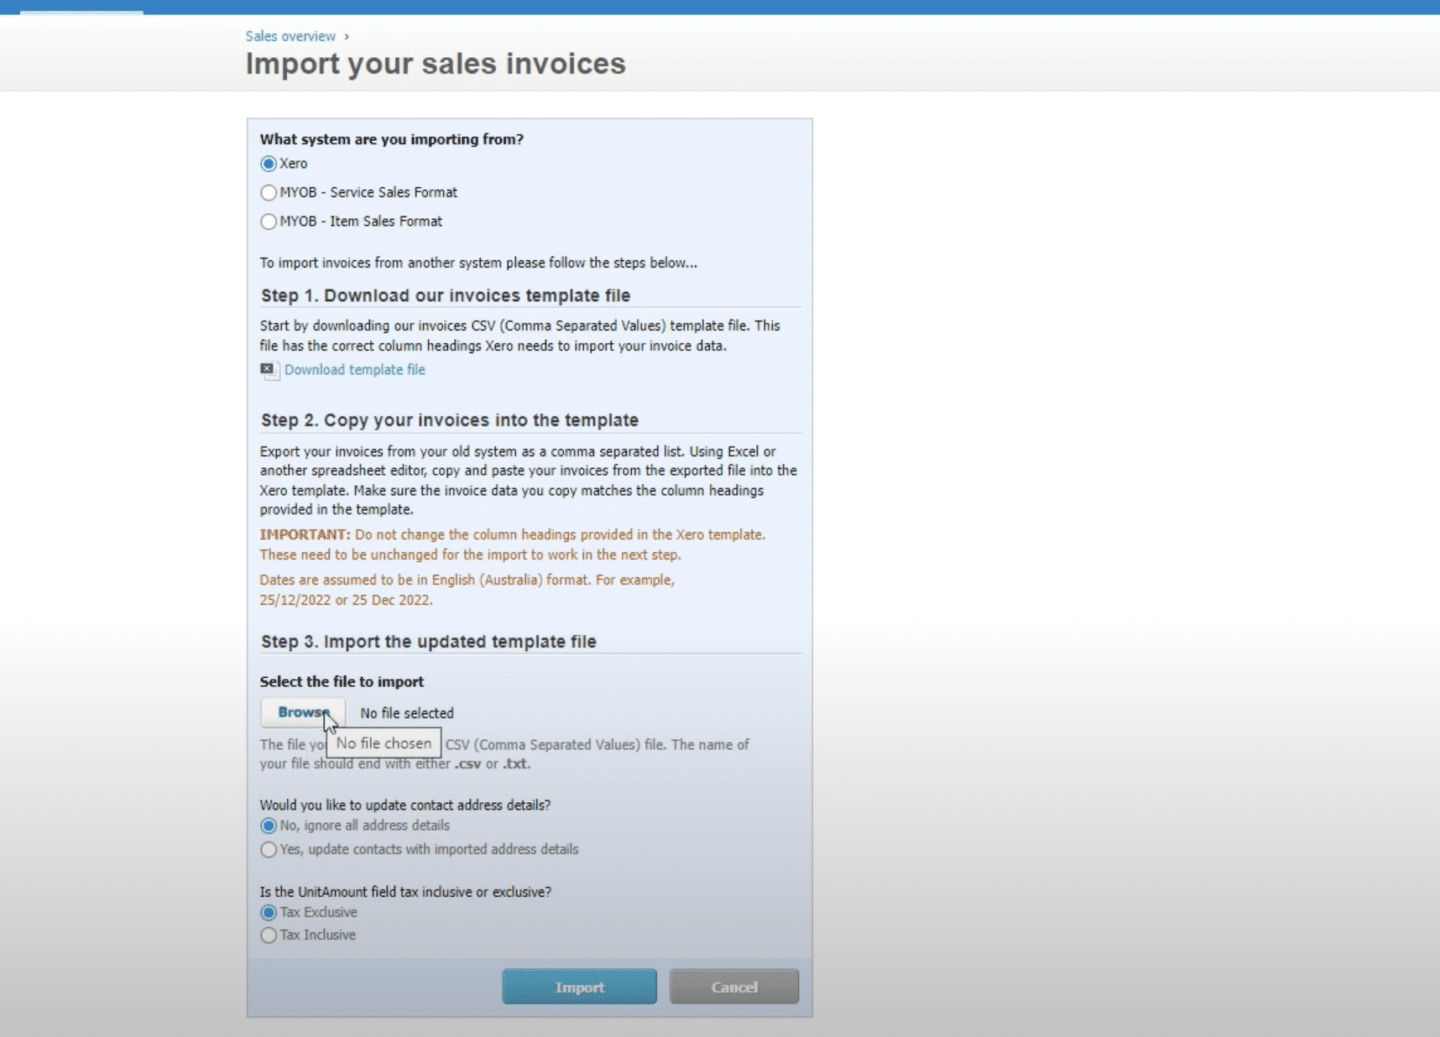
Click Download Template to get the official Xero CSV template file. This template contains all the correct column headings that Xero expects. Do not rename, reorder, or remove any columns from the template, as this will cause import errors.
Prepare your CSV data
Open the downloaded template in Excel or Google Sheets and paste your invoice data into the corresponding columns. ContactName and InvoiceNumber are required for draft invoices. Make sure contact names match existing Xero contacts exactly to avoid creating duplicate records.
Format dates and multi-line invoices
Ensure all dates use the format matching your Xero region setting (DD/MM/YYYY for UK/AU/NZ or MM/DD/YYYY for US). For invoices with multiple line items, repeat the same InvoiceNumber across multiple rows. Xero automatically consolidates rows sharing the same InvoiceNumber into a single invoice.
Save the file as CSV
After filling in all your invoice data, save the file in CSV (Comma Separated Values) format. In Excel, use File > Save As and select CSV from the file type dropdown. In Google Sheets, use File > Download > Comma-separated values (.csv).
Upload and configure the import
Back in Xero's import wizard, click Browse to select your saved CSV file. Choose whether amounts in your file are tax-exclusive or tax-inclusive. You can also choose whether to update existing contact addresses with the data from your file.
Review and complete the import
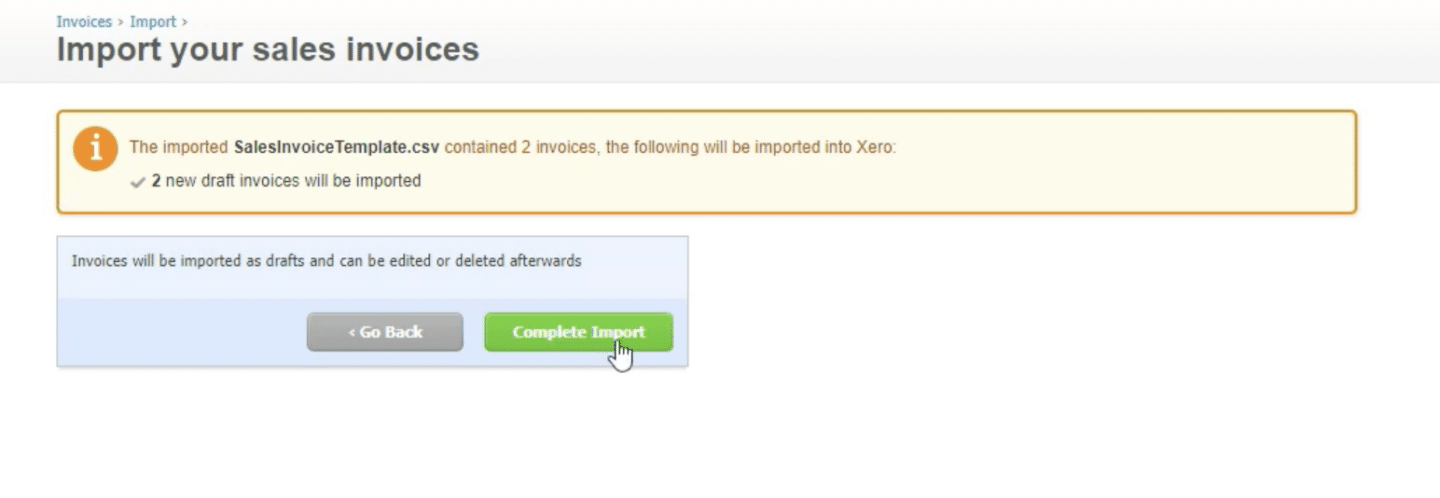
Click Import to let Xero scan and validate your file. Xero displays a summary showing how many invoices will be created and flags any errors such as duplicate invoice numbers, missing required fields, or unrecognized tax types. Fix any errors in your CSV and re-upload if needed, then click Complete Import.
Review imported invoices in Drafts
Navigate to Business > Invoices and open the Draft tab. All newly imported invoices appear here for review. Check that amounts, line items, tax rates, and contact details are correct. Once verified, select the invoices and click Approve to move them to the Awaiting Payment status.
Required Xero Fields
| Field | Type | Description | Example |
|---|---|---|---|
| ContactName | Text | Customer name (must match existing contact or creates new) | John Smith |
| InvoiceNumber | Text | Unique invoice number (no duplicates allowed) | 1001 |
| InvoiceDate | Date | Invoice date (DD/MM/YYYY or MM/DD/YYYY based on region) | 14/01/2026 |
| DueDate | Date | Payment due date | 13/02/2026 |
| Description | Text | Line item description | Widget Pro - Blue |
| Quantity | Number | Quantity ordered | 2 |
| UnitAmount | Currency | Unit price (decimal, no currency symbol) | 49.99 |
| AccountCode | Text | Xero account code for revenue (e.g., 200, 4000) | 200 |
| TaxType | Text | Tax rate name (must exactly match Xero config) | 20% (VAT on Income) |
Xero requires these fields for successful import.