How to Export Transactions from Square (2026 Guide)
Follow these steps to export your Square transactions as a CSV file. Once exported, you can use any of our converter tools to transform the data for your target system.
Export Steps
Sign in to your Square Dashboard
Go to squareup.com and sign in with your Square account credentials. Make sure you are viewing the correct business account if you manage multiple locations or businesses under the same login.
Navigate to the Reports section
In the left-side navigation menu, click Reports (or Reporting). This section provides access to all of Square's built-in reports including sales summaries, item sales, payment methods, taxes, and detailed transaction data.
Select the Transactions report
From the Reports section, navigate to Payments and then select Transactions. This view shows a detailed list of all payment transactions including card payments, cash, refunds, and other tender types processed through your Square account.
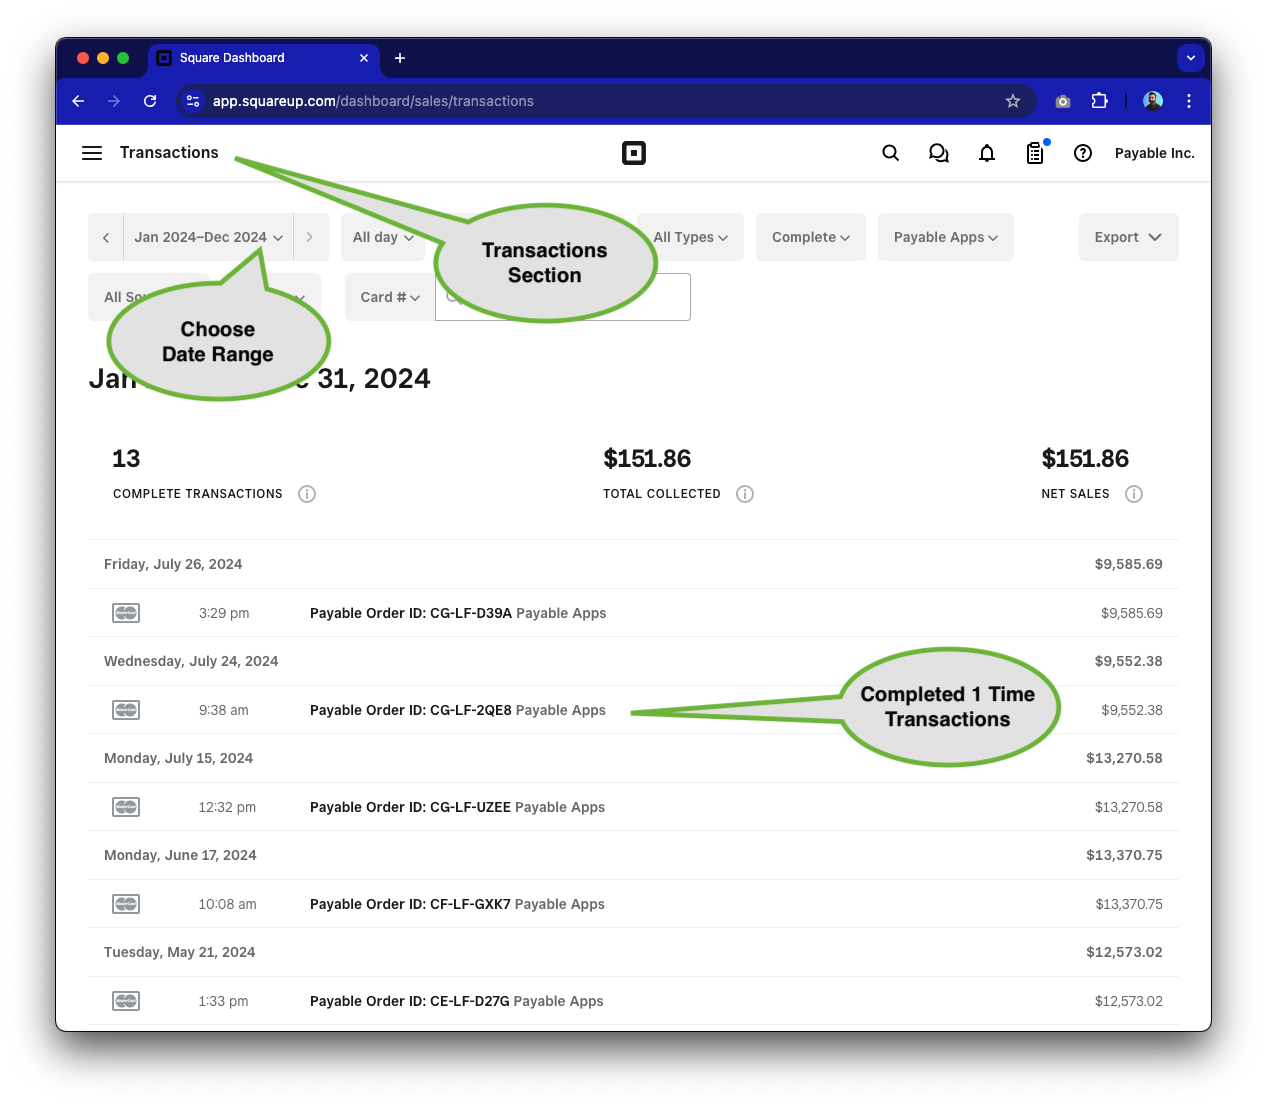
Set your date range and filters
Use the date range picker at the top of the report to select the time period you want to export. You can choose a preset range like Today, This Week, or This Month, or define a custom date range. Optionally filter by location, employee, or transaction source.

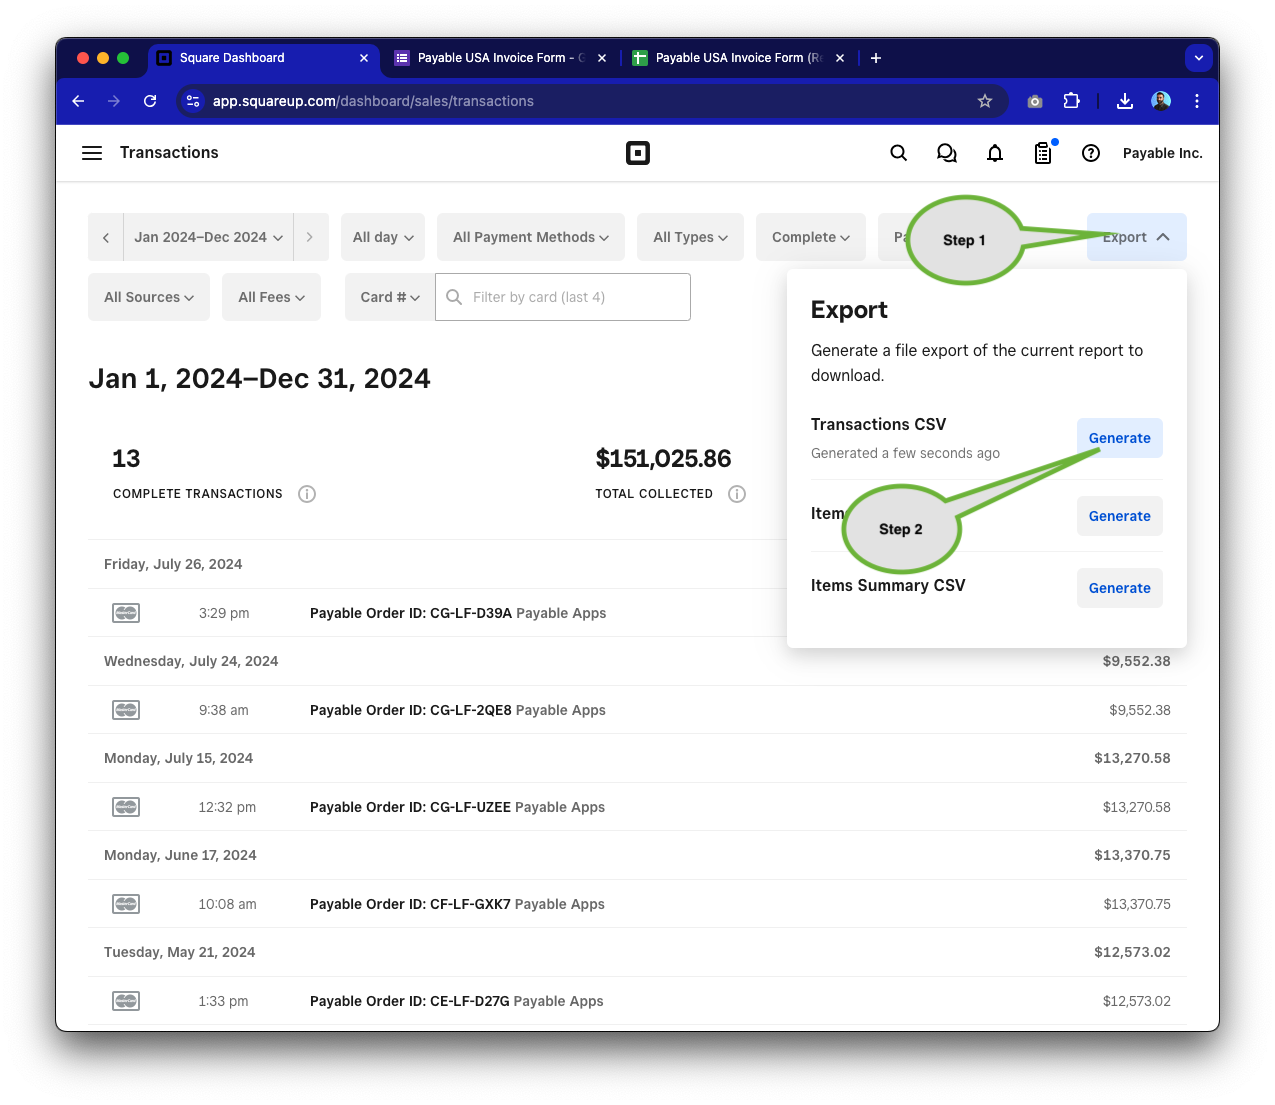
Click Export and choose CSV format
Click the Export button in the upper-right corner of the report view. From the dropdown, select Transactions CSV. Square will generate the file and download it to your computer. The file contains one row per transaction with all financial details.
Review the downloaded CSV
Open the CSV file in a spreadsheet application like Excel or Google Sheets. Verify that key columns are present including Transaction ID, Date, Gross Sales, Fees, Net Total, and payment method details. Check that fees appear as negative values, which is Square's standard convention.
Verify totals against your Square Dashboard
Compare the sum of the Net Total column in your CSV to the deposit totals shown in your Square Dashboard under Payments. The figures should match for the same date range. If there are discrepancies, check for pending transactions or holds that may not appear in the export.
Required Transactions Fields
| Field | Type | Description | Example |
|---|---|---|---|
| Transaction ID | Text | Unique alphanumeric transaction identifier | abc123def456 |
| Date | Date | Transaction date (YYYY-MM-DD format) | 2026-01-15 |
| Net Total | Currency | Amount deposited to bank (Total Collected - Fees) | 99.30 |
Your Square export must include these fields for successful conversion.