How to Import Bank Transaction 3Col to QuickBooks Online (2026 Guide)
After converting your data with one of our tools, follow these steps to import the bank transaction 3col into QuickBooks Online.
Import Steps
Format your CSV with three columns
Prepare your CSV file with exactly three columns: Date, Description, and Amount. Use MM/DD/YYYY for dates. The Amount column uses negative values for debits (payments/expenses) and positive values for credits (deposits/income). Remove all currency symbols ($, etc.) and thousand separators (commas) from the Amount column.
Navigate to Bank Transactions
In QuickBooks Online, go to Transactions > Bank Transactions from the left sidebar. If you have not yet connected any bank accounts, you will see an option to connect or upload. If you already have accounts listed, select the account you want to upload transactions to.
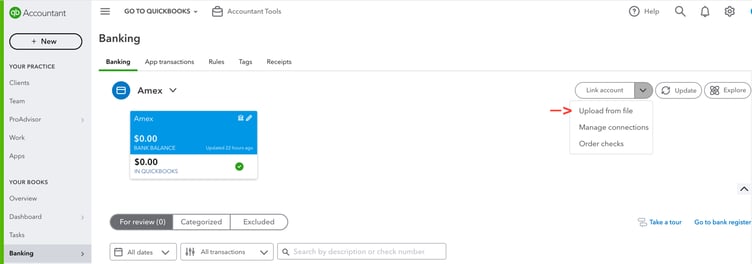
Choose Upload from File
Click the 'Link account' dropdown in the upper right area, then select 'Upload from file'. On the next screen, choose the manual upload option. This allows you to upload a CSV file directly rather than connecting to a bank feed.
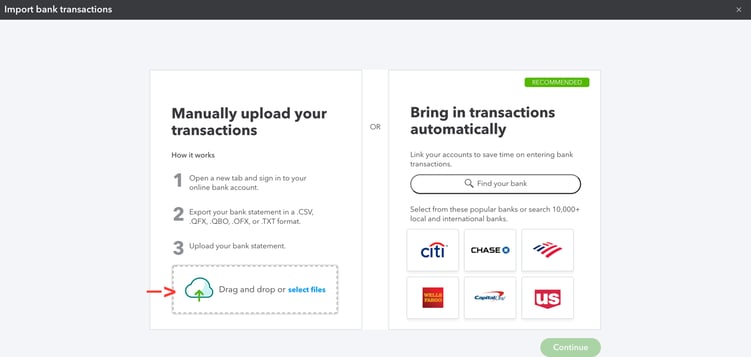
Upload your CSV file
Drag and drop your CSV file into the upload area, or click 'Select files' to browse your computer. After the file is uploaded, QuickBooks will read it and proceed to the account selection step.
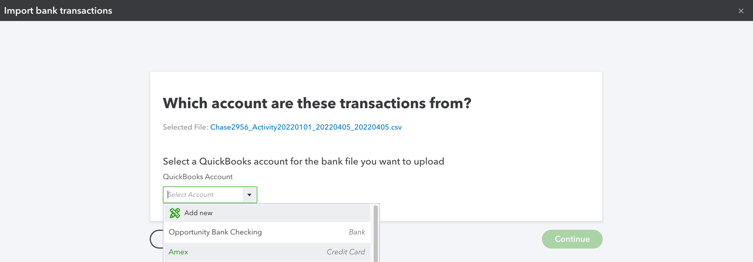
Select the destination bank account
Use the dropdown menu to choose which QuickBooks bank or credit card account should receive the uploaded transactions. Make sure you select the correct account, as transactions will be added to this account's register. Click Continue to proceed.
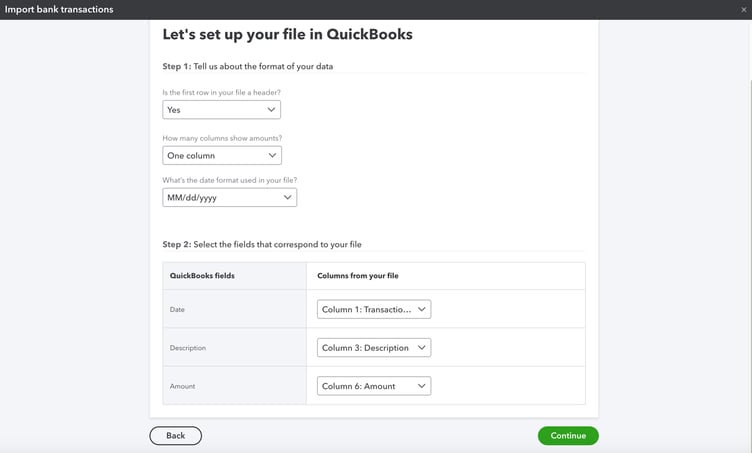
Configure column mapping
QuickBooks asks you to answer formatting questions about your file. Confirm whether the first row is a header, how many columns contain amounts (select one for the 3-column format), and the date format used in your file. Then map each column to the correct QuickBooks field: Date, Description, and Amount.
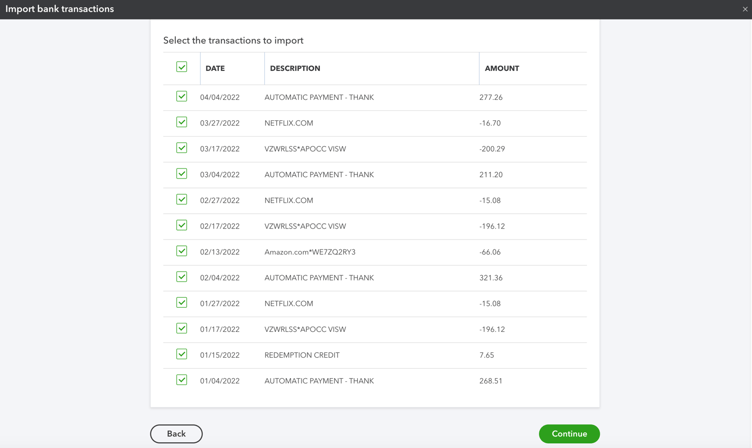
Review and select transactions
QuickBooks displays a preview of the transactions it will import. Review the list to verify that expenses appear as negative values and deposits appear as positive values. If something looks inverted, go back and adjust the mapping. Select the transactions you want to import and click Continue.
Categorize and match imported transactions
After the upload is complete, your transactions appear in the Banking feed under the 'For Review' tab. QuickBooks treats these like bank-fed transactions. Review each one, assign a category (account), and click Add or Match to record them. Matched transactions reconcile with existing records, while added transactions create new entries.
Required QuickBooks Online Fields
| Field | Type | Description | Example |
|---|---|---|---|
| Date | Date | Transaction date (MM/DD/YYYY) | 01/18/2025 |
| Description | Text | Transaction description (payee + memo combined) | Amazon.com - Office supplies order #12345 |
| Amount | Currency | Transaction amount (negative for debits/payments, positive for credits/deposits) | -150.50 |
QuickBooks Online requires these fields for successful import.