How to Import Chart Of Accounts to Xero (2026 Guide)
After converting your data with one of our tools, follow these steps to import the chart of accounts into Xero.
Import Steps
Navigate to Chart of Accounts
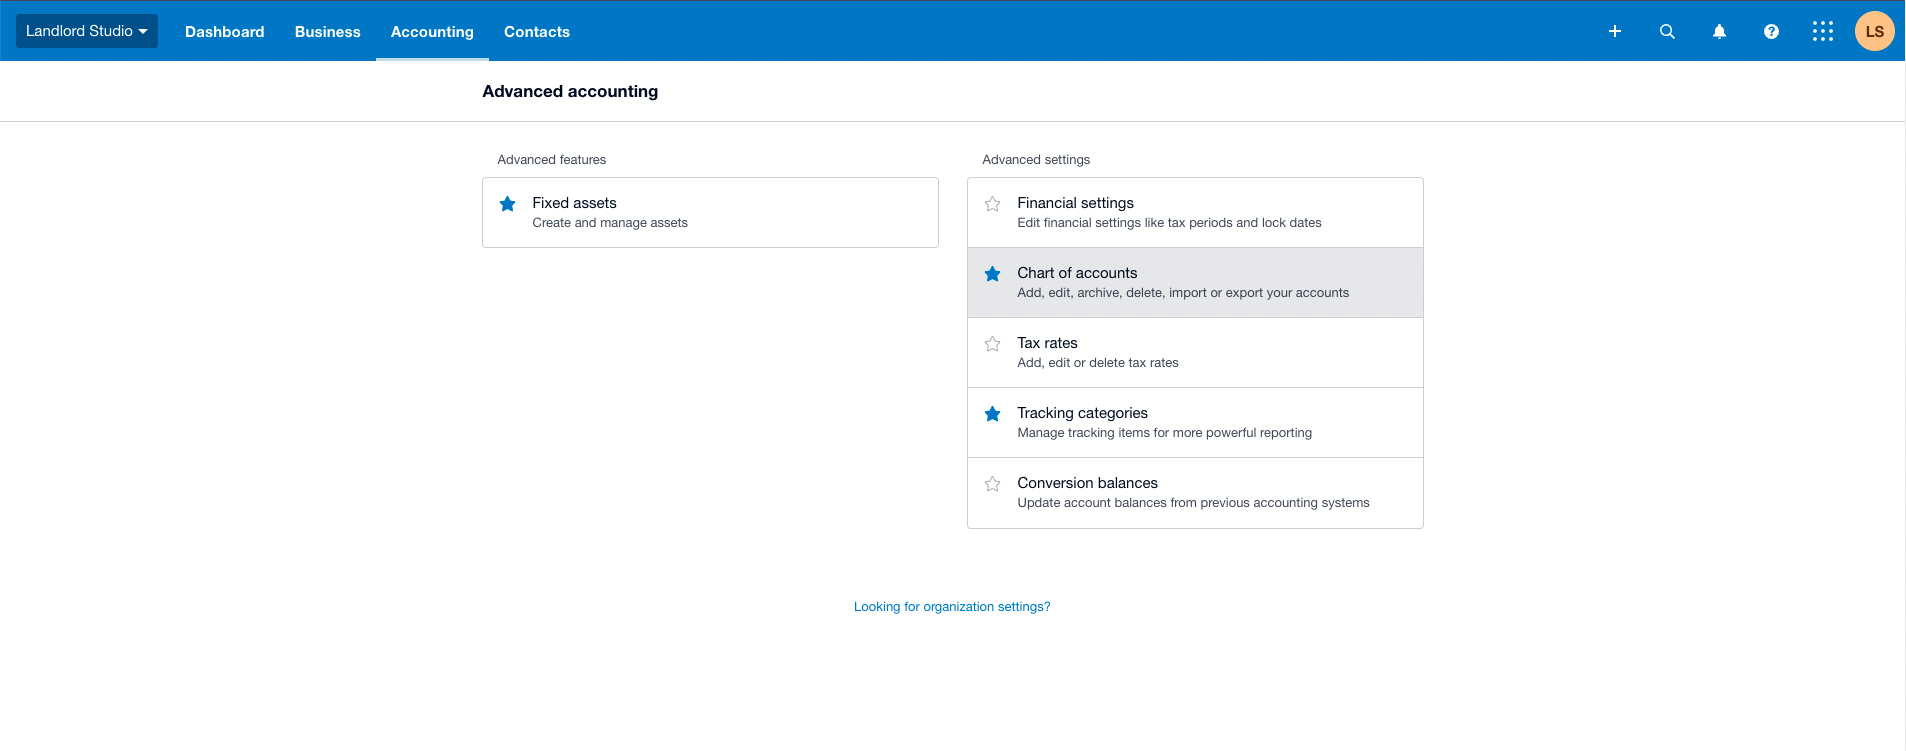
Log in to your Xero account and click the Accounting menu in the top navigation bar. Select Advanced from the dropdown, then click Chart of Accounts under the Advanced Settings section. This page displays your current account structure organized by type.
Back up your existing chart of accounts
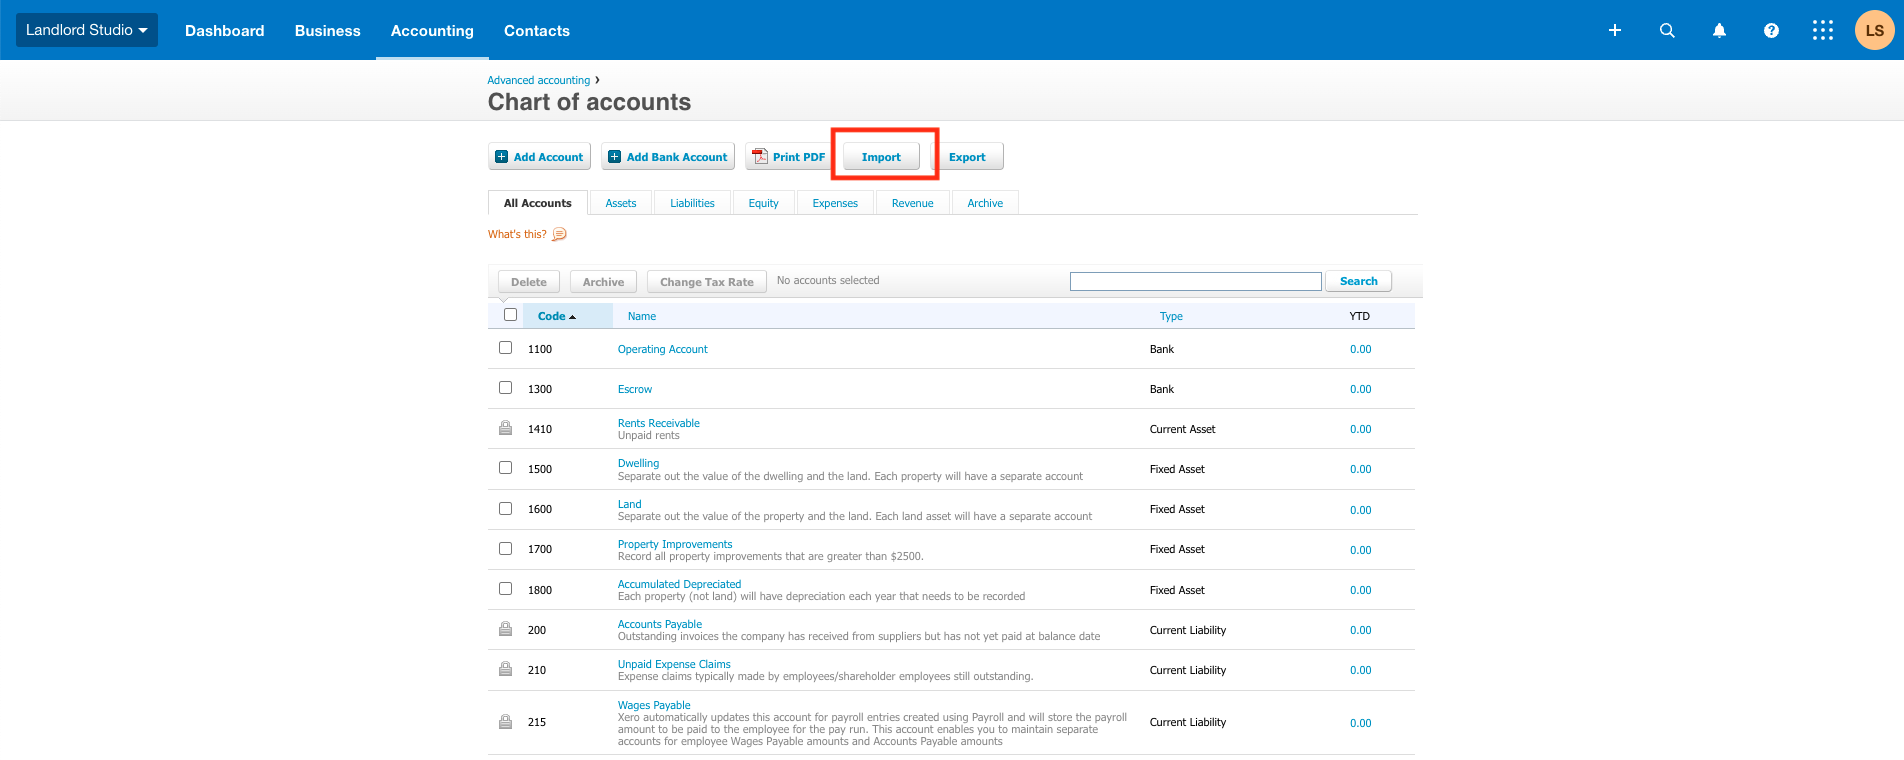
Before importing, export your current chart of accounts as a backup. Click Export on the Chart of Accounts page to download a CSV copy of your existing account structure. Save this file in a safe location in case you need to restore it after the import.
Open the import function
On the Chart of Accounts page, click the Import button. This opens the chart of accounts import wizard where you can upload your CSV or TXT file containing the new account structure.
Prepare your CSV file
Your CSV file must include three required columns marked with asterisks: *Code (unique account code, max 10 alphanumeric characters), *Name (account name, max 150 characters), and *Type (one of Xero's predefined account type codes such as REVENUE, EXPENSE, BANK, CURRENT, etc.). Optional columns include Description, Tax Type, Enable Payments, Show In Expense Claims, and Currency Code.
Use correct account type codes
The *Type column must use one of Xero's exact type codes. Common types include REVENUE for sales income, EXPENSE for general expenses, BANK for bank accounts, CURRENT for current assets, CURRLIAB for current liabilities, FIXED for fixed assets, EQUITY for equity accounts, and DIRECTCOSTS for cost of goods sold. Refer to Xero's documentation for the complete list of valid type codes.
Upload the CSV file
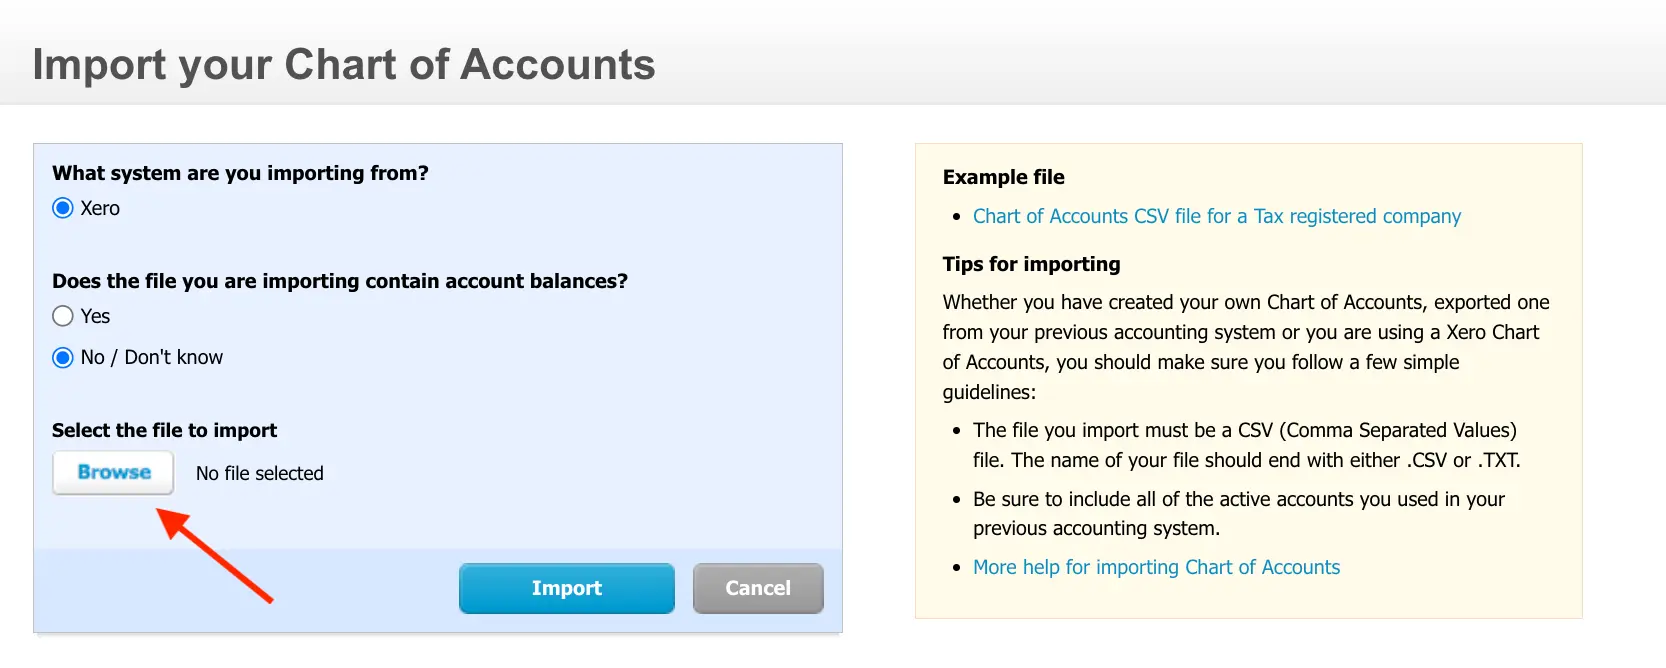
In the import wizard, click Browse or Select File to choose your prepared CSV file. Xero reads the file and validates the contents. If the file format is correct, Xero displays a preview of the accounts that will be created or updated.
Configure bank accounts
If your import includes accounts of type BANK, Xero prompts you to review and confirm the bank account settings. You can assign currency codes and enable payment services for these accounts during this step. If you prefer to configure bank accounts later, you can do so under Accounting > Advanced > Bank Accounts.
Complete the import and verify
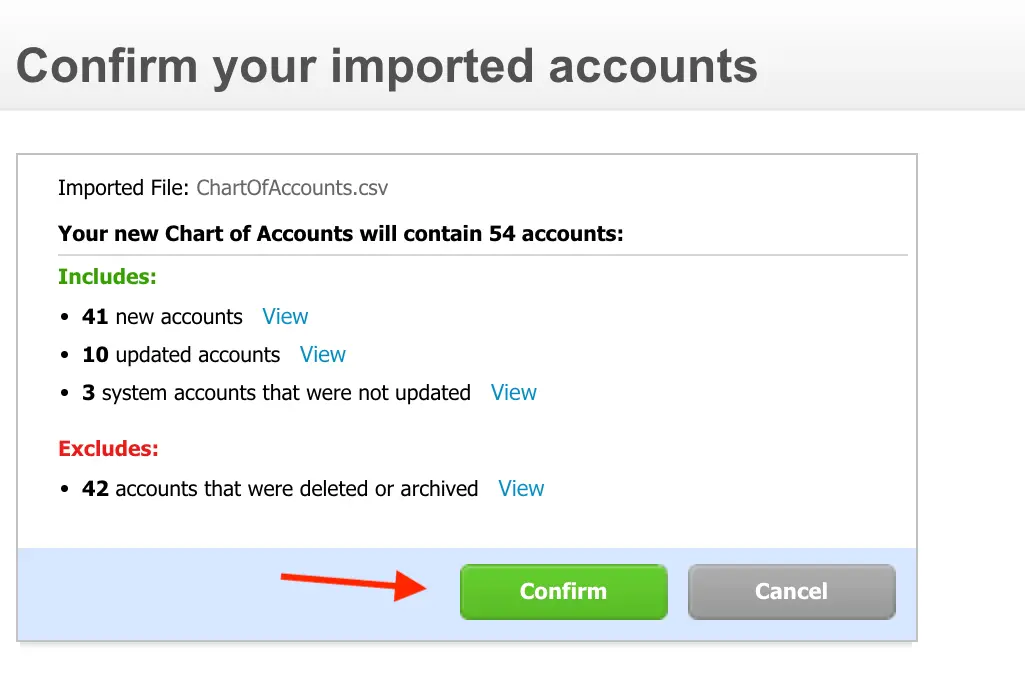
Click Import to finalize the chart of accounts upload. Navigate back to Accounting > Advanced > Chart of Accounts to review the imported account structure. Check that account codes, names, types, and tax settings are correct. You can edit any individual account by clicking on it in the list.
Required Xero Fields
| Field | Type | Description | Example |
|---|---|---|---|
| *Code | Text | Account code (unique, max 10 chars, alphanumeric) | 4000 |
| *Name | Text | Account name (max 150 chars) | Sales of Product Income |
| *Type | Choice | Xero account type code | REVENUE |
Xero requires these fields for successful import.