How to Export Products from WooCommerce (2026 Guide)
Follow these steps to export your WooCommerce products as a CSV file. Once exported, you can use any of our converter tools to transform the data for your target system.
Export Steps
Log in to your WordPress admin dashboard
Navigate to yoursite.com/wp-admin and sign in with your administrator or shop manager credentials. You need sufficient permissions to access the WooCommerce product management area.
Navigate to the Products page
In the WordPress admin sidebar, click on Products and then All Products. This opens the product list page showing all your store's products, including simple, variable, grouped, and external product types.
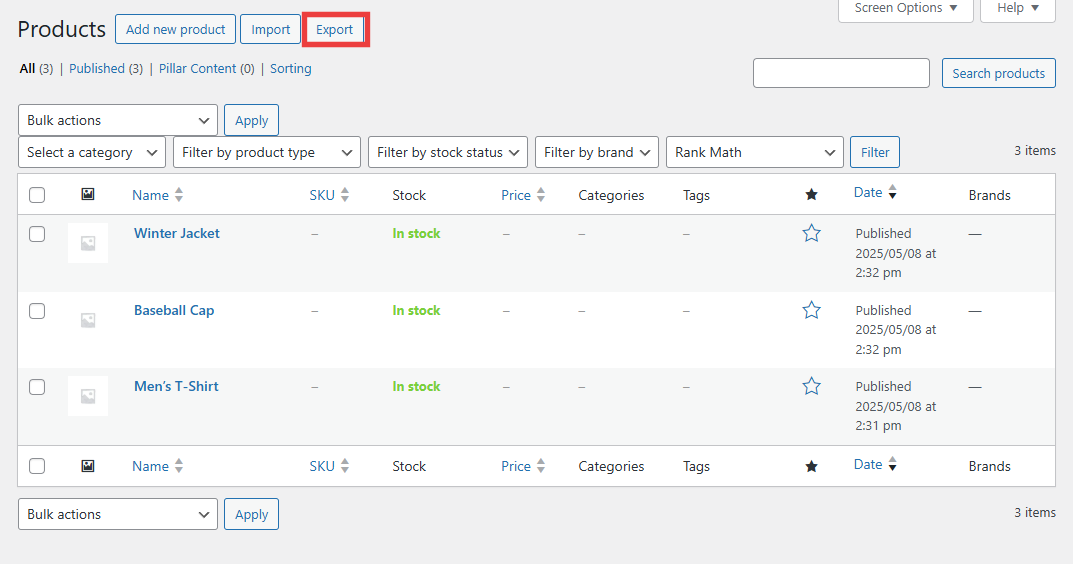
Click the Export button
At the top of the All Products page, locate and click the Export button. This opens the built-in WooCommerce product CSV exporter dialog where you can configure what data to include in your export file.
Select columns to export
In the export dialog, use the dropdown to choose which columns to include. You can select Export All Columns to get everything, or pick specific fields like Name, SKU, Regular Price, Sale Price, Categories, Stock, and Description. For a complete backup or migration, select all columns.
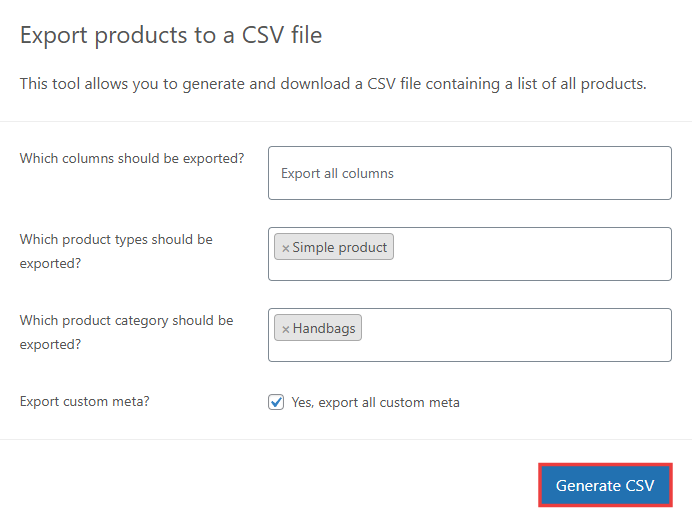
Choose product types and categories
Optionally filter your export by product type (Simple, Variable, Grouped, External) and by category. This is helpful if you only need to export products from a specific collection or of a certain type. Leave both set to All if you want a complete catalog export.
Generate and download the CSV
Click the Generate CSV button to start the export. WooCommerce will process your products and automatically prompt your browser to download the file. For large catalogs with hundreds or thousands of products, this may take a minute to complete.
Verify the exported product data
Open the downloaded CSV file in Google Sheets or a text editor to confirm the data is complete and properly formatted. Check that product names, prices, SKUs, and stock quantities are present and correct. Variable products will have their variations exported as separate rows linked by the parent product ID.
Required Products Fields
| Field | Type | Description | Example |
|---|---|---|---|
| ID | Number | Product ID | 101 |
| Type | Text | Product type | simple |
| Name | Text | Product name/title | Blue Widget |
Your WooCommerce export must include these fields for successful conversion.