How to Export Orders from Wix (2026 Guide)
Follow these steps to export your Wix orders as a CSV file. Once exported, you can use any of our converter tools to transform the data for your target system.
Export Steps
Log in to your Wix dashboard
Open your browser and navigate to manage.wix.com to access your Wix site dashboard. Sign in with your Wix account credentials. You need to be the site owner or have eCommerce management permissions to export order data.
Navigate to the Orders page
In the left sidebar of your dashboard, click on Orders under the eCommerce or Store section. This opens the orders management page showing all your store orders with their status, date, and payment information.
Filter orders if needed
Use the filter and search options at the top of the orders list to narrow down which orders you want to export. You can filter by fulfillment status, payment status, date range, or search for specific orders by number or customer name.
Select orders to export
Check the checkbox at the top-left to select all orders on the current page, or individually select specific orders by clicking their checkboxes. To export your entire order history, ensure no filters are applied and select all.
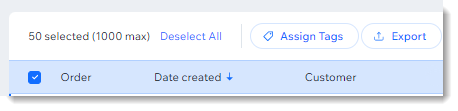
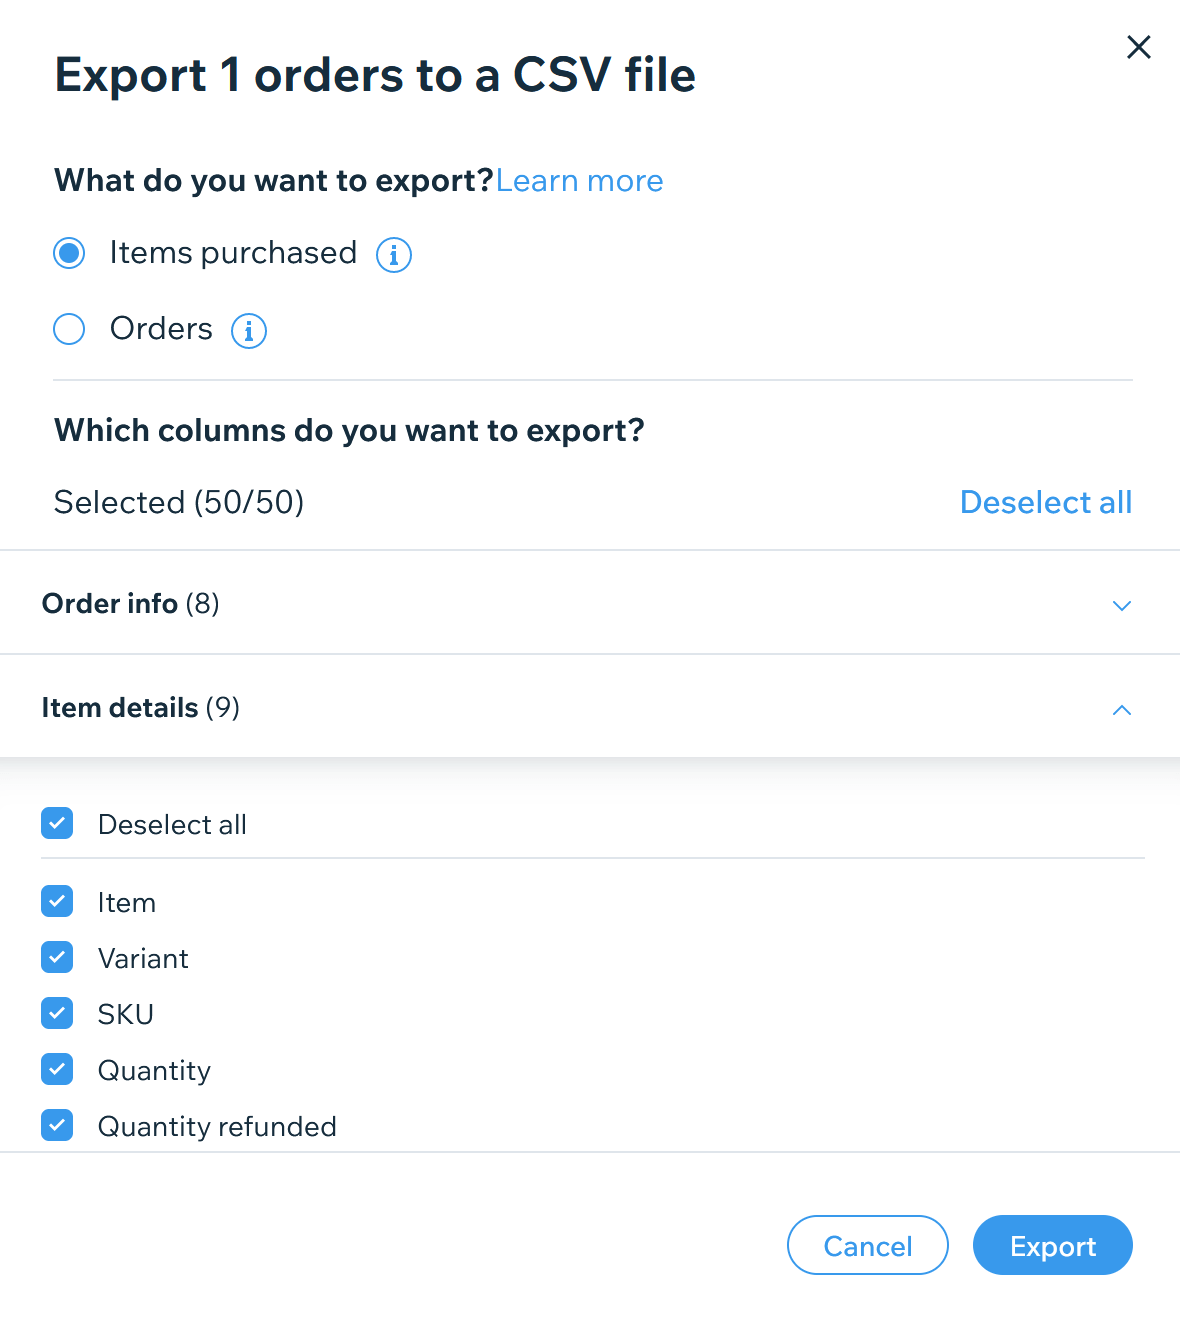
Click Export and choose columns
With orders selected, look for the Export option in the action bar that appears. In the export popup, choose the Items purchased option and select all columns you need. You can deselect columns like billing or delivery details if they are not needed for your specific use case.

Download the CSV file
Click the Export button in the popup dialog. The CSV file will be downloaded directly to your computer. If you are using Safari, you may need to press Cmd+S to save the file manually with a .csv extension.
Verify the exported data
Open the downloaded CSV file in Google Sheets or a spreadsheet application. Check that order numbers, dates, customer information, and line item details are properly formatted. Each line item appears as a separate row with the order header information repeated for that order.
Required Orders Fields
| Field | Type | Description | Example |
|---|---|---|---|
| order_number | Text | Unique order number | 1001 |
| date_created | Date/Time | Order creation date/time | 2025-01-15 14:30:00 |
| subtotal | Currency | Order subtotal (before tax and shipping) | 100.00 |
| total | Currency | Order grand total | 118.00 |
| billing_email | Text | Billing email address | john@example.com |
| item_name | Text | Product/item name | Blue Widget |
| item_quantity | Number | Item quantity | 2 |
| item_price | Currency | Unit price | 50.00 |
| item_total | Currency | Line total (quantity × price) | 100.00 |
Your Wix export must include these fields for successful conversion.