How to Import Iif to QuickBooks Desktop (2026 Guide)
After converting your data with one of our tools, follow these steps to import the iif into QuickBooks Desktop.
Import Steps
Back up your company file
Before importing any IIF file, always create a backup of your QuickBooks Desktop company file. Go to File > Back Up Company > Create Local Backup and save it to a safe location. IIF imports cannot be easily undone, so a backup ensures you can restore your data if the import produces unexpected results.
Switch to single-user mode
IIF imports require single-user access to the company file. If you are in multi-user mode, go to File > Switch to Single-user Mode. This ensures no other users can modify the file during the import process. You must be logged in as the Admin user to import IIF files.
Verify accounts and names exist
Every account name (ACCNT column) in your IIF file must exactly match an account in your QuickBooks Chart of Accounts, including capitalization and spacing. Similarly, customer and vendor names (NAME column) should match existing records. Go to Lists > Chart of Accounts and Lists > Customer:Job List to verify. Create any missing accounts or names before importing.
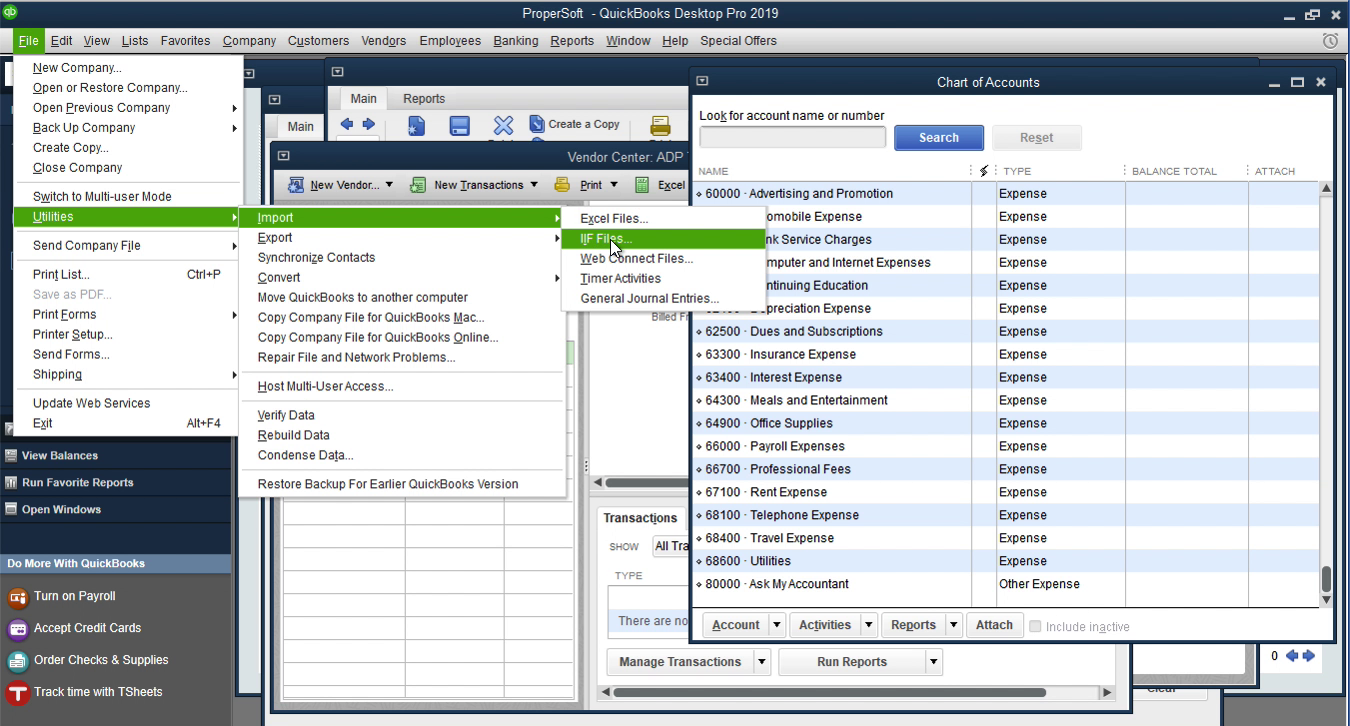
Open the IIF import tool
In QuickBooks Desktop, go to File > Utilities > Import > IIF Files. QuickBooks may prompt you to close all open windows before the import can proceed. Click OK to close all windows and continue to the file selection dialog.
Close all open windows
QuickBooks requires that all windows within the application be closed before importing. If prompted, click OK to let QuickBooks close all open forms and reports automatically. This prevents data conflicts during the import process.
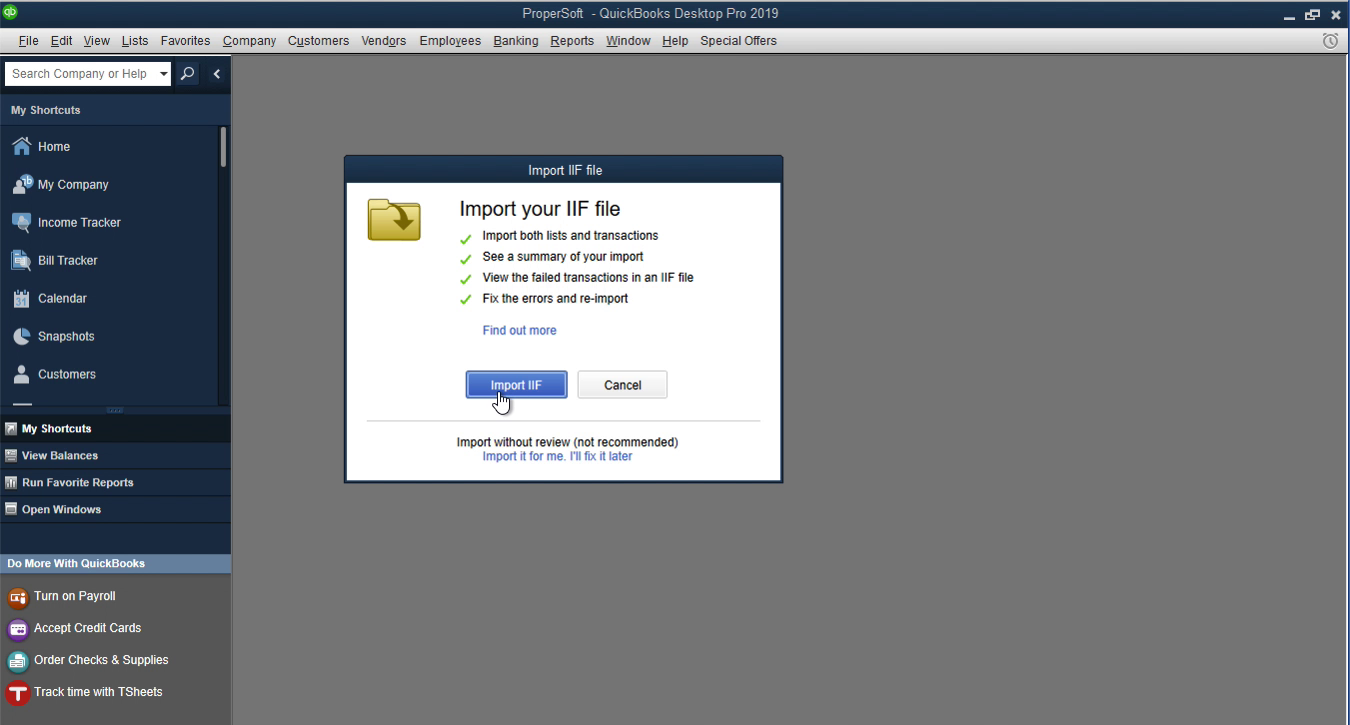
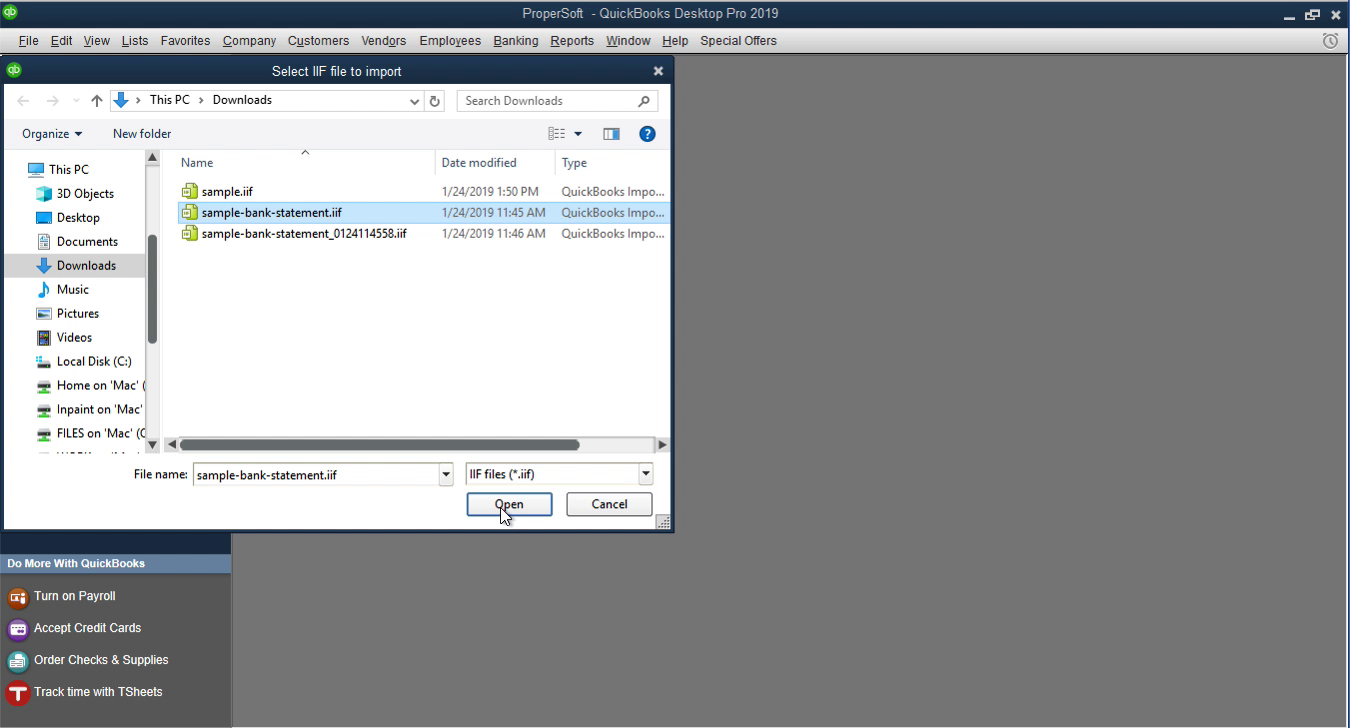
Select your IIF file
In the file browser dialog, navigate to the folder containing your IIF file. Select the .iif file and click Open. QuickBooks will read the file and begin processing the transactions, lists, or other data contained in it.
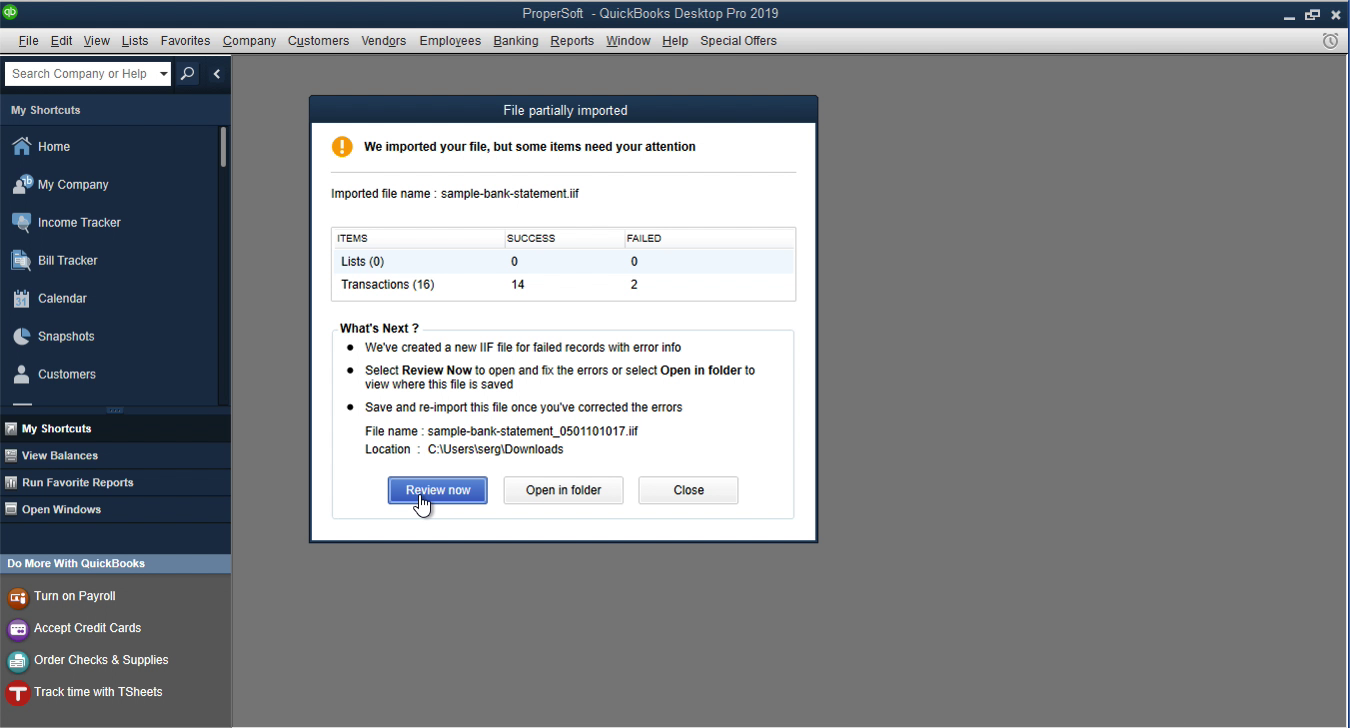
Confirm the import
QuickBooks processes the IIF file and displays a confirmation dialog. If the import is successful, you will see a message indicating that the data was imported. If there are errors, QuickBooks shows an error log explaining which rows failed and why. Common errors include missing accounts, unbalanced transactions, or invalid date formats.
Verify the imported transactions
After the import, verify the data was imported correctly. Go to Reports > Accountant & Taxes > Journal to see the imported journal entries, or check the relevant registers for sales receipts and invoices. Look for the transaction dates and amounts from your IIF file. If anything looks wrong, restore your backup and correct the IIF file before re-importing.
Required QuickBooks Desktop Fields
| Field | Type | Description | Example |
|---|---|---|---|
| ROW_TYPE | Text | Row type (TRNS, SPL, ENDTRNS) | TRNS |
| TRNSTYPE | Text | Transaction type (CASH SALE, INVOICE, CHECK, etc.) | CASH SALE |
QuickBooks Desktop requires these fields for successful import.