How to Import Contacts Csv Export to Outlook Contacts (2026 Guide)
After converting your data with one of our tools, follow these steps to import the contacts csv export into Outlook Contacts.
Import Steps
Locate your downloaded CSV file
Find the Outlook contacts CSV file in your downloads folder. The file uses Outlook's native column naming convention with fields like First Name, Last Name, E-mail Address, Home Phone, Business Phone, and Company. This format is designed for direct import into Microsoft Outlook.
Optional: Review in Excel
Before importing, you can open the CSV in Excel to review and clean the contact data. Check for duplicate entries, verify email addresses, and ensure names are formatted correctly. Save the file as CSV with UTF-8 encoding for best results with special characters and international names.
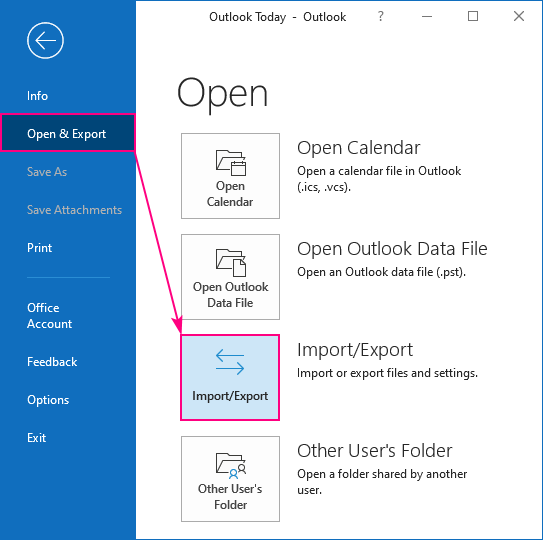
Open Outlook Import Wizard
Open Microsoft Outlook on your desktop. Click File in the top menu bar, then click Open & Export, then click Import/Export. This opens the Import and Export Wizard which guides you through the process step by step.
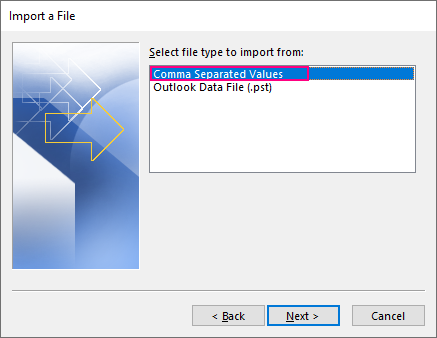
Select import type and file
In the wizard, select Import from another program or file and click Next. Choose Comma Separated Values as the file type and click Next. Click Browse to locate your CSV file and select how to handle duplicates: replace, allow, or do not import.
Select destination folder
Choose the Contacts folder as the destination for your imported contacts. If you use multiple Outlook accounts, make sure you select the Contacts folder under the correct email account.

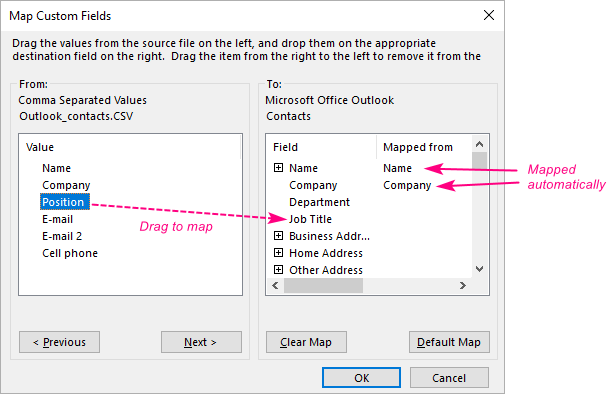
Map custom fields (if needed)
If the CSV columns do not automatically match Outlook's contact fields, click Map Custom Fields. Drag fields from the source CSV column list on the left to the matching Outlook contact field on the right. This step ensures that phone numbers, addresses, and other details land in the correct fields.
Complete the import
Click Finish to start the import. Outlook will process the CSV file and add the contacts to your address book. Once complete, navigate to the People or Contacts section in Outlook to verify that all contacts imported with the correct information.
Required Outlook Contacts Fields
| Field | Type | Description | Example |
|---|---|---|---|
| First Name | Text | First name | John |
| Last Name | Text | Last name | Doe |
Outlook Contacts requires these fields for successful import.