How to Export Contacts Csv from Outlook Contacts (2026 Guide)
Follow these steps to export your Outlook Contacts contacts csv as a CSV file. Once exported, you can use any of our converter tools to transform the data for your target system.
Export Steps
Open Microsoft Outlook
Launch Microsoft Outlook on your desktop (Windows or Mac). If you are using the new Outlook or Outlook on the web (outlook.com), the export steps differ slightly and are covered below. Make sure you are signed in to the account that contains the contacts you want to export.
Open the Import/Export wizard (Classic Outlook)
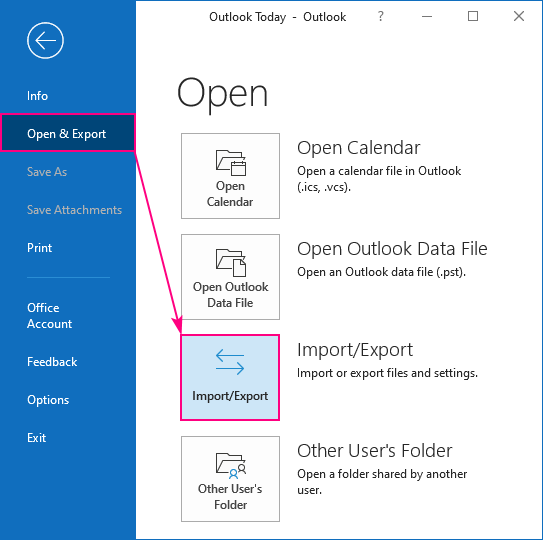
In Classic Outlook for desktop, click 'File' in the top menu bar. Select 'Open & Export' from the left sidebar, then click 'Import/Export'. This opens the Import and Export Wizard, which handles both importing and exporting data from Outlook.
Select 'Export to a file'
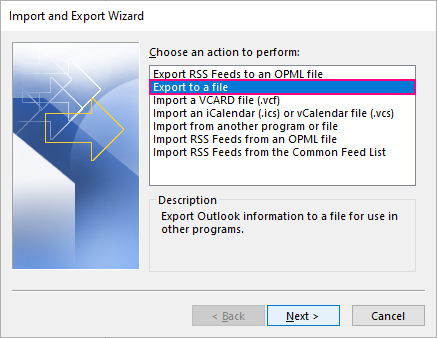
In the Import and Export Wizard, select 'Export to a file' from the list of actions and click 'Next'. On the next screen, choose 'Comma Separated Values' as the file type and click 'Next'. This ensures your contacts will be saved in standard CSV format.
Choose the Contacts folder
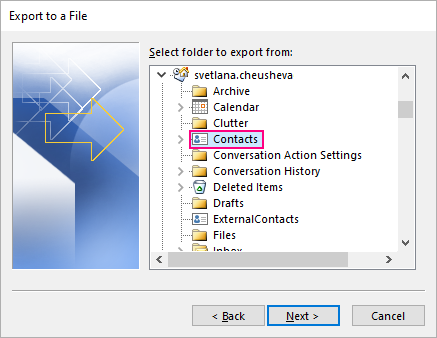
In the folder selection screen, expand your email account and select the 'Contacts' folder. If you have multiple contact folders or sub-folders, choose the specific one that contains the contacts you want to export. Click 'Next' to proceed.
Save the CSV file
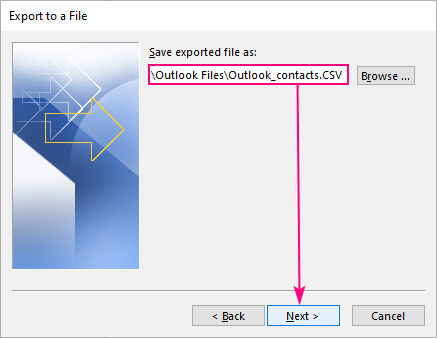
Click 'Browse' to choose a folder on your computer where you want to save the file. Enter a descriptive file name such as 'outlook-contacts.csv'. Click 'OK' to confirm the save location, then click 'Finish' to start the export. The process may take a few seconds depending on the number of contacts.
Export from New Outlook or Outlook on the web (alternative method)
In the new Outlook or Outlook.com, navigate to the People (Contacts) section. In the ribbon at the top, click 'Manage contacts' and then select 'Export contacts'. Choose the contacts folder from the dropdown and click 'Export'. The CSV file will download to your browser's default Downloads folder.
Verify the exported CSV
Open the downloaded CSV file in Excel or a text editor. Outlook CSV exports use a flat column structure with fields like 'First Name', 'Last Name', 'E-mail Address', 'Business Phone', 'Mobile Phone', 'Home Street', 'Company', and 'Job Title'. Confirm that your contact data appears correctly.
Required Contacts Csv Fields
| Field | Type | Description | Example |
|---|---|---|---|
| First Name | Text | First name | John |
| Last Name | Text | Last name | Doe |
Your Outlook Contacts export must include these fields for successful conversion.