How to Import Journal Entry to NetSuite (2026 Guide)
After converting your data with one of our tools, follow these steps to import the journal entry into NetSuite.
Import Steps
Download the Journal Entry CSV template
Navigate to Transactions > Financial > Make Journal Entries and click Import. On the Scan & Upload CSV File page, click the Single Journal Entry Template File link to download the official CSV template. Save this template locally and use it as the starting point for your data.
Populate the CSV with your journal entry data
Open the downloaded template in Excel or Google Sheets and fill in your journal entry data. Each journal entry must have at least two lines with balancing debits and credits. Header fields like External ID, Date, and Memo appear on the first line, while each subsequent line contains Account, Debit or Credit, and optional line-level fields.
Set External IDs to prevent duplicate imports
Assign a unique External ID to every journal entry in the CSV. NetSuite uses this field to identify and deduplicate records. If you re-import the same file later, entries with matching External IDs will be flagged rather than duplicated. Use a consistent naming convention such as SOURCE-TYPE-UNIQUEID.
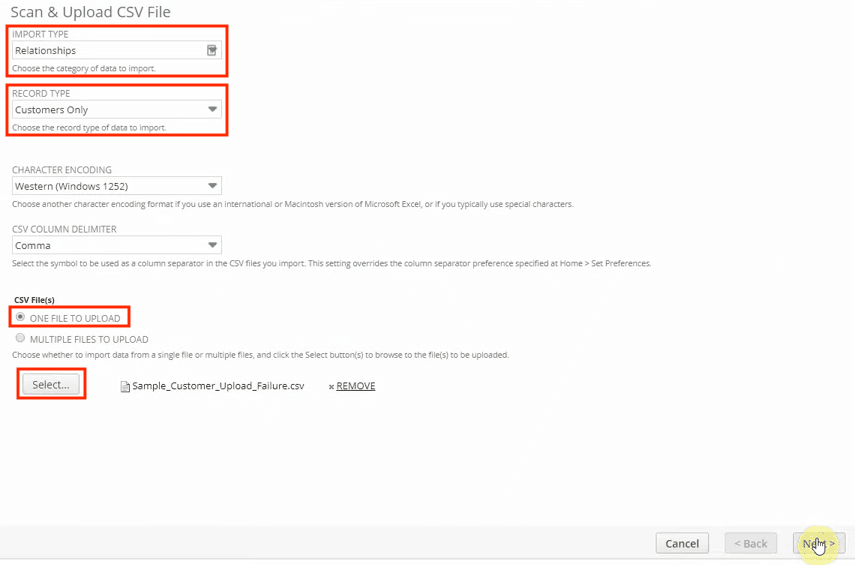
Select character encoding and upload the CSV
On the Scan & Upload CSV File page, select the character encoding that matches your file (UTF-8 is the most common default). Click Select, choose your populated CSV file, then click Open followed by Next to proceed to field mapping.
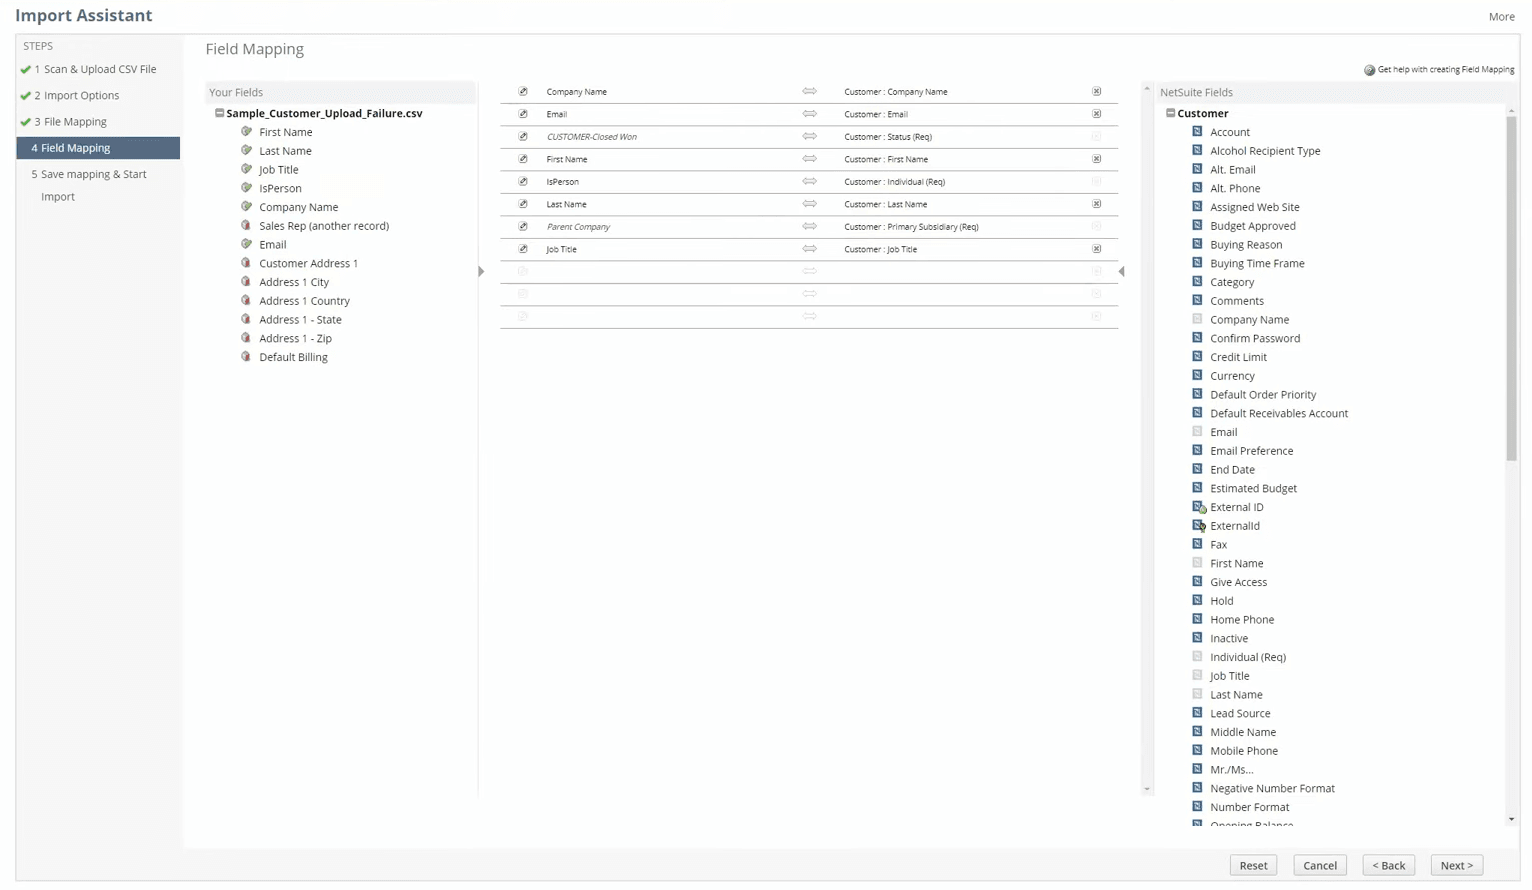
Review and adjust field mapping
On the View Mapping / Start Import page, NetSuite will auto-map columns from your CSV to the corresponding journal entry fields. Review each mapping carefully and drag-and-drop fields to correct any mismatches. Click the pencil icon next to a field to set a default value for unmapped or blank columns.
Run a test import with a small sample first
Before importing all records, select just one or two journal entries from your CSV and run a test import. Verify that the resulting journal entry in NetSuite has the correct accounts, amounts, dates, and memo text. This catches mapping errors before they affect your full dataset.
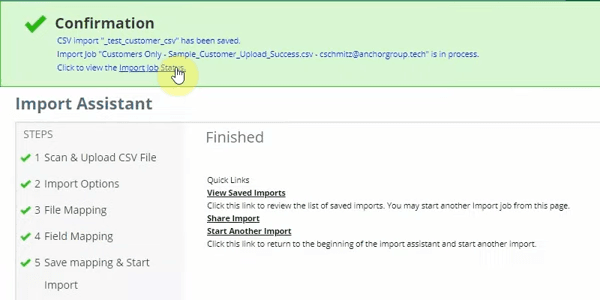
Execute the full import
Once your test import looks correct, return to the import assistant and upload the complete CSV file. Click Run to start the import. NetSuite will process the file and display the created journal entry upon successful completion.
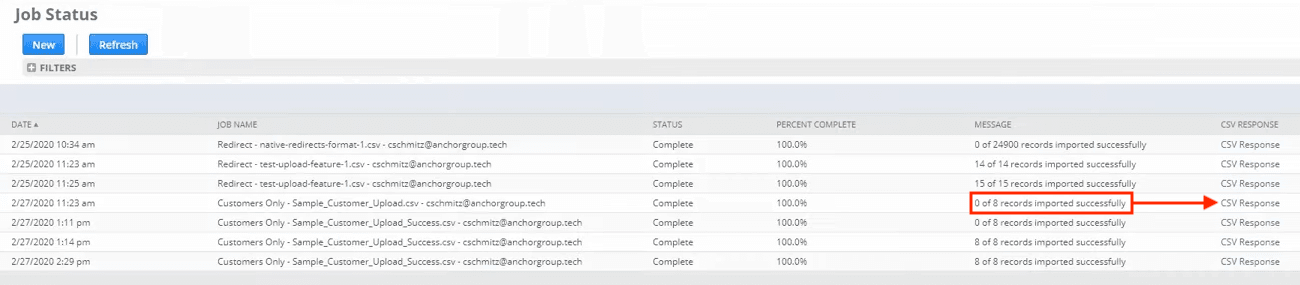
Review results and fix any errors
If the import succeeds, the new journal entry appears immediately for review. If any errors occur, NetSuite redirects you to the Job Status page. Click the CSV Response link to download a results file that contains your original data alongside error messages for each failed row. Correct the errors in your CSV and re-import.
Required NetSuite Fields
| Field | Type | Description | Example |
|---|---|---|---|
| External ID | Text | Unique identifier (prevents duplicates) | STRIPE-PAYOUT-po_1234567890 |
| Date | Date | Transaction date (MM/DD/YYYY) | 01/15/2025 |
| Account | Text | GL account number or name | 1000 Bank Account |
NetSuite requires these fields for successful import.