How to Import Books Invoice to Zoho Books (2026 Guide)
After converting your data with one of our tools, follow these steps to import the books invoice into Zoho Books.
Import Steps
Navigate to the Invoices import page
Log in to your Zoho Books organization. From the left sidebar, go to Sales and then select Invoices. Click the More icon (three dots) in the top-right corner of the Invoices list page and choose Import Invoices from the dropdown.
Upload your CSV file
Click Choose File and select your invoice CSV file. Zoho Books accepts CSV, TSV, and XLS formats with a maximum file size of 10 MB. If you need a reference for the expected column format, click the sample file link on the upload page to download a template.
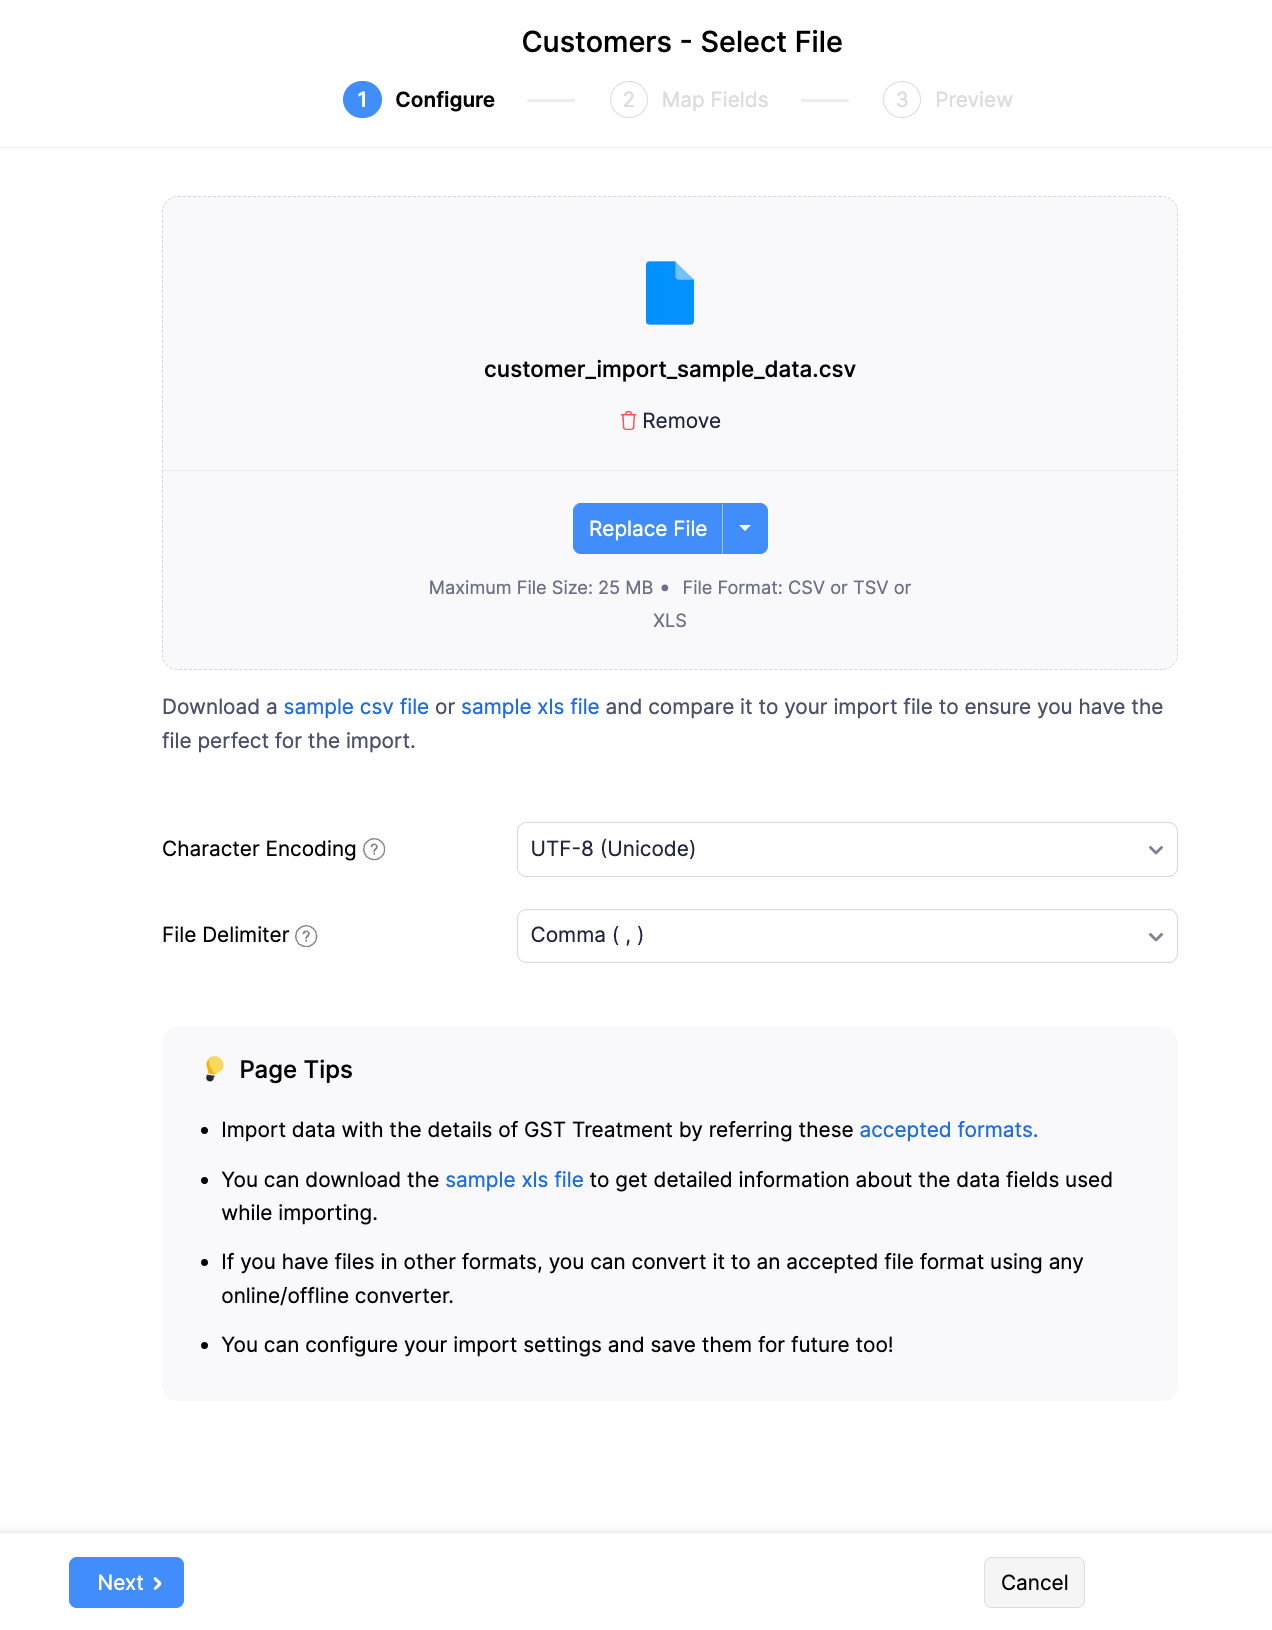
Configure character encoding and import options
On the Configure tab, set the Character Encoding field. The default is UTF-8 (Unicode), which works for most files. If your invoices should link to existing Sales Orders, check the Link to Sales Orders option. Enable Customer Address Mapping to update matched customer addresses or create new customer records automatically for unmatched names.
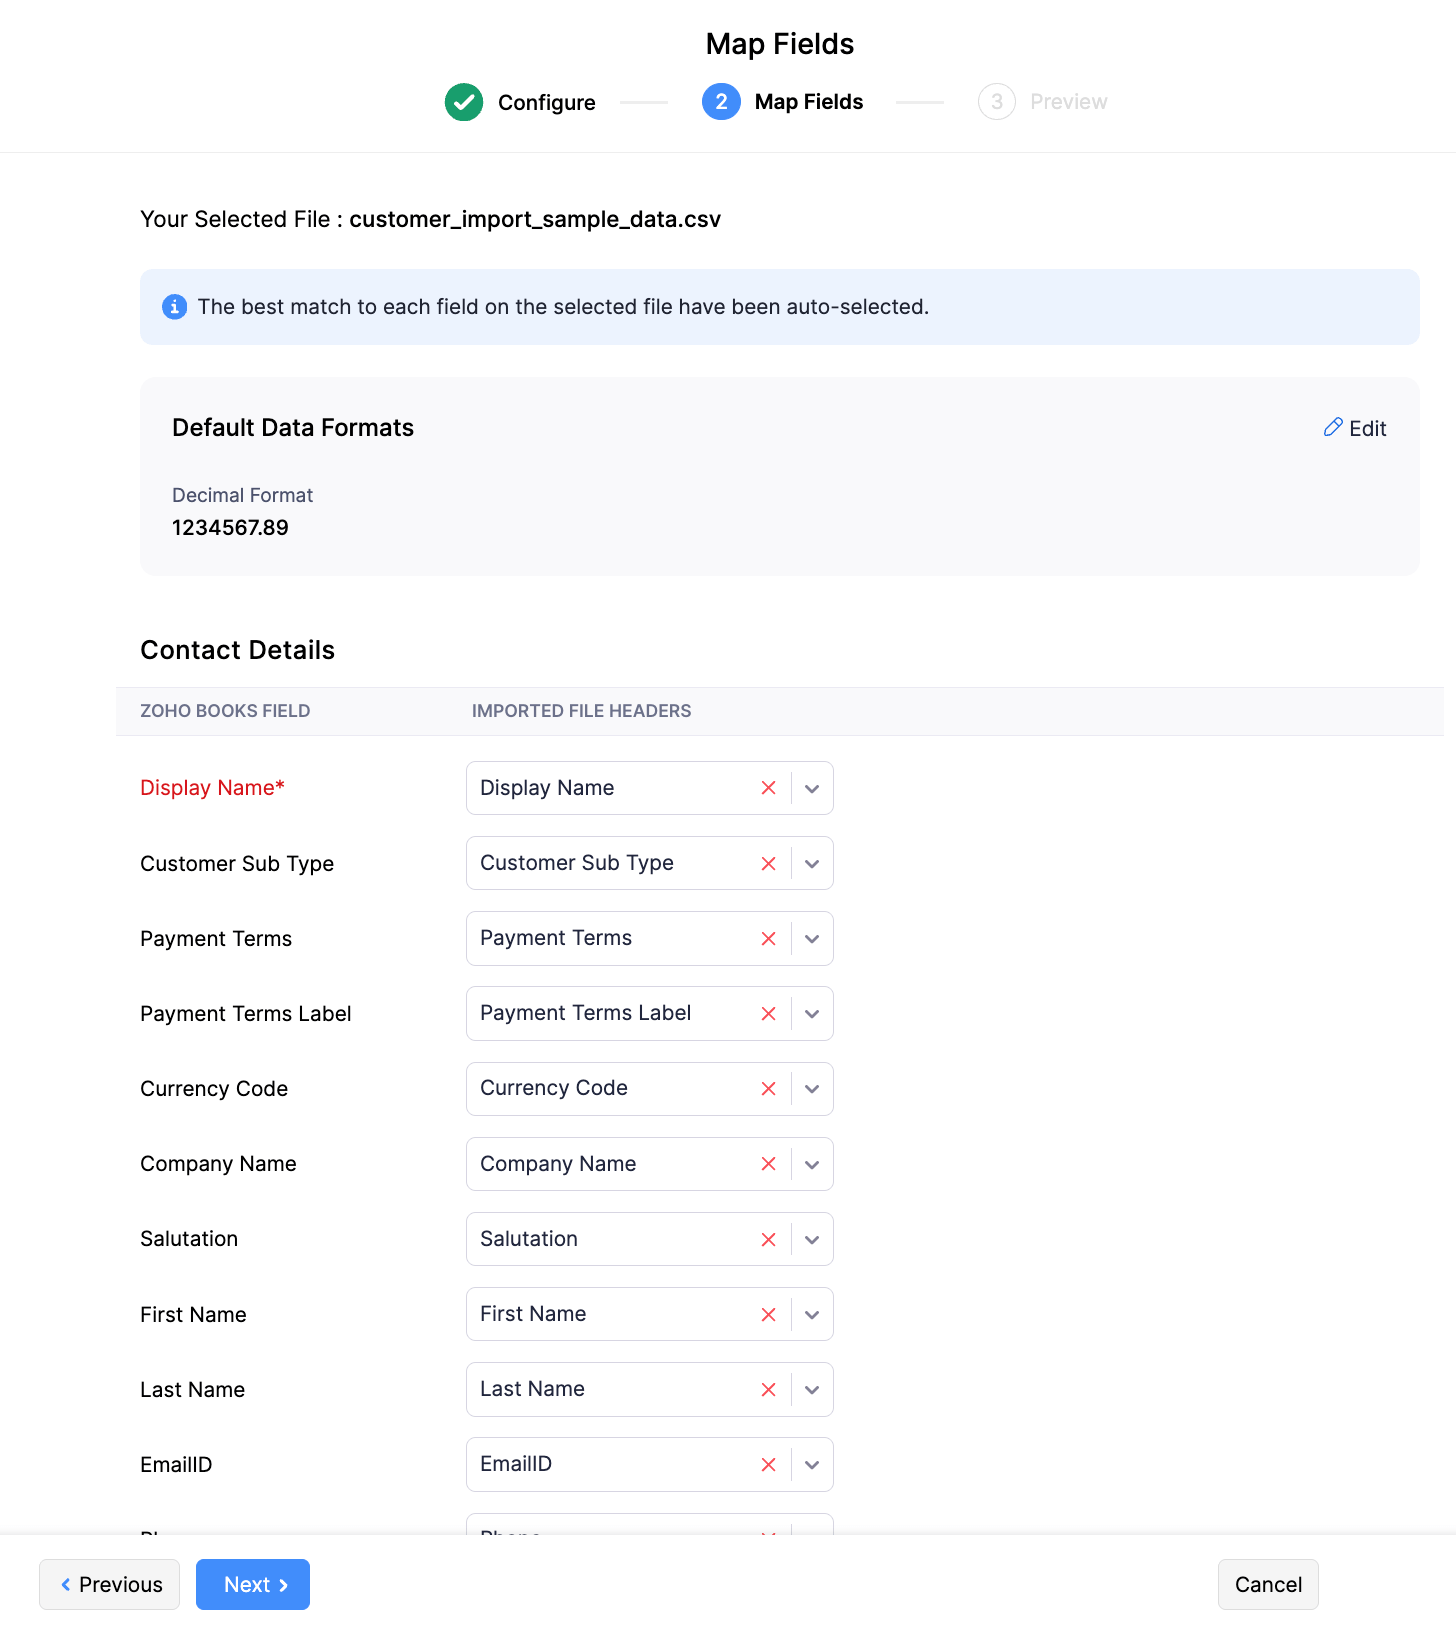
Map CSV columns to Zoho Books invoice fields
On the Map Fields tab, Zoho Books attempts to auto-map your columns to its invoice fields. Verify that Customer Name, Invoice Date, Item Name, Quantity, and Rate are mapped correctly. Set the default date and decimal formats if they differ from the defaults. Click Edit next to a field to customize the mapping.
Save field mappings for future imports
If you plan to import invoices regularly, check the option to save your field mappings. This preserves your column-to-field assignments so you do not need to re-map every time. Saved mappings are available the next time you use the import assistant.
Preview the import and verify data
On the Preview page, Zoho Books shows a summary of how your data will be imported. Review the field values, check that multi-line invoices are grouped correctly by Invoice Number, and confirm amounts and dates look accurate. If anything is wrong, go back and adjust your mappings.

Complete the import
Click Import to finalize the process. Zoho Books will process your file and create the invoices. Navigate back to Sales > Invoices to confirm that all invoices appear with the correct line items, amounts, and customer associations.
Verify imported invoices
Open several imported invoices at random and verify that amounts, line items, taxes, and due dates transferred correctly. Check that new customers were created if you enabled that option. If any invoices have issues, you can edit them directly in Zoho Books or delete and re-import with corrected data.
Required Zoho Books Fields
| Field | Type | Description | Example |
|---|---|---|---|
| Customer Name | Text | Customer name (creates if doesn't exist) | Acme Corporation |
| Invoice Date | Date | Invoice date (DD/MM/YYYY or MM/DD/YYYY) | 15/01/2025 |
| Item Name | Text | Product/service name (creates if doesn't exist) | Professional Consulting |
| Quantity | Decimal | Item quantity | 10 |
| Rate | Currency | Unit price | 150.00 |
Zoho Books requires these fields for successful import.