How to Import Intacct Journal Entry to Sage Intacct (2026 Guide)
After converting your data with one of our tools, follow these steps to import the intacct journal entry into Sage Intacct.
Import Steps
Download the Sage Intacct journal entry import template
Navigate to General Ledger > All > Journal Entries and click Import, then Download Template. Alternatively, access it via Company > Setup > Import Data. The template is automatically customized with your company's active dimensions (Department, Location, etc.) so you see the exact columns Intacct expects.
Understand the header and line-item structure
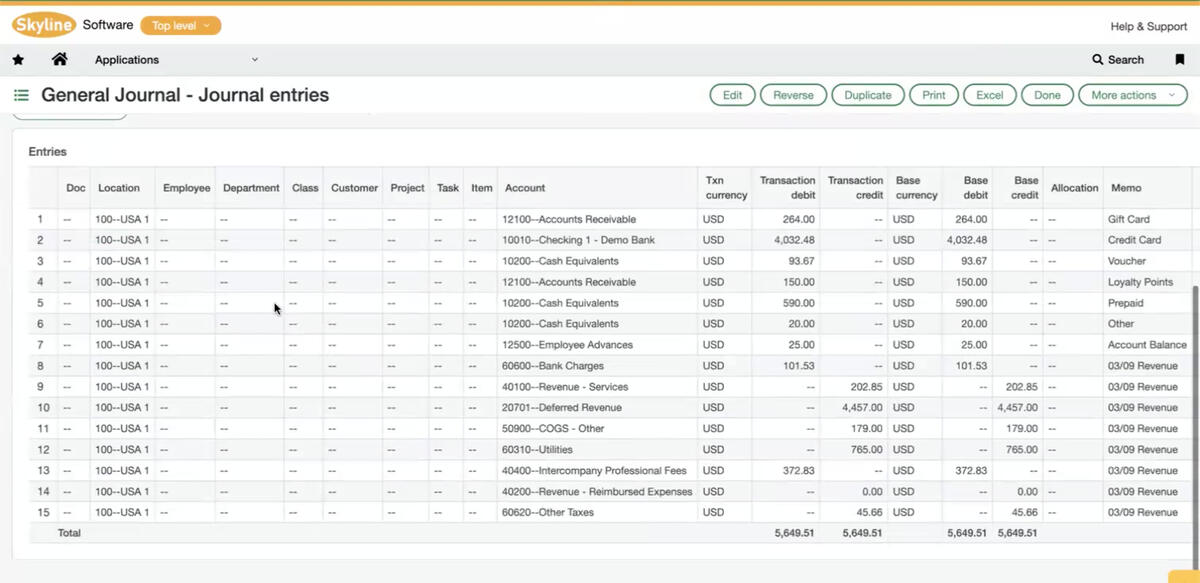
Each journal entry in the CSV has header fields and line items. Header fields like Journal ID, Entry Date, and Description apply to the entire transaction. Line items contain the Account Number, Debit or Credit amounts, and optional dimensions. Start entering data on row 3 of the template (rows 1 and 2 contain headers and field descriptions).
Fill in the journal entry data
For each journal entry, enter the Journal ID to group related debit and credit lines. Set LINE_NO starting at 1 and increment sequentially for each line within the same entry. Enter Account Number values (not account titles) that match your Intacct chart of accounts. Fill in either Debit or Credit for each line, leaving the other blank.
Add dimension fields for reporting
Sage Intacct supports dimension tracking on journal entry lines. Assign Department, Location, and Vendor/Customer values to each line item where applicable. These dimension values must match existing records in Intacct exactly (use IDs, not display names). Dimensions allow detailed reporting and drill-down in financial statements.
Format cells and save as plain CSV
Format all cells as text in your spreadsheet to prevent automatic number or date reformatting. Ensure all dates use a consistent format (MM/DD/YYYY is standard). Save the file as a plain CSV (not UTF-8 CSV or Excel format). Do not change or remove the column headers from the template.
Upload the CSV file to Sage Intacct
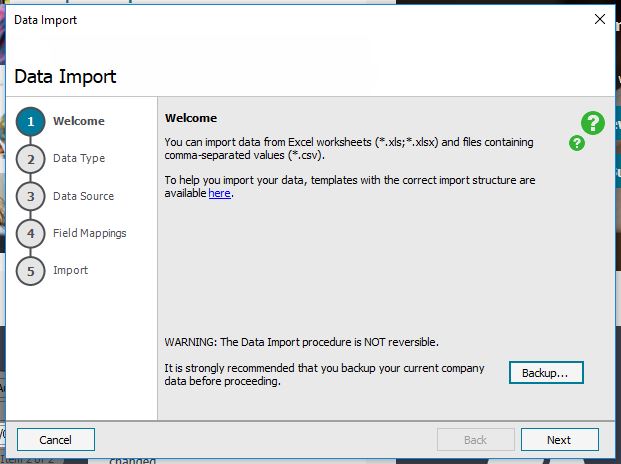
Go to General Ledger > All > Journal Entries and click Import (or Import Transactions). Click Choose File, browse to your CSV, and select Open. Choose the date format that matches your file. Click Upload to start processing the file.
Review results and fix any errors
Intacct validates the file and reports any errors. Common issues include unbalanced entries, invalid account numbers, and dimension mismatches. If errors are found, correct them in your CSV and re-upload. Successfully imported entries appear in General Ledger > All > Journal Entries.
Required Sage Intacct Fields
| Field | Type | Description | Example |
|---|---|---|---|
| Journal ID | Text | Journal entry identifier (groups debit/credit lines) | JE-2025-0001 |
| Entry Date | Date | Journal entry date (MM/DD/YYYY) | 01/15/2025 |
| Account Number | Text | GL account number | 1000 |
Sage Intacct requires these fields for successful import.