How to Export Vendor Export from QuickBooks Online (2026 Guide)
Follow these steps to export your QuickBooks Online vendor export as a CSV file. Once exported, you can use any of our converter tools to transform the data for your target system.
Export Steps
Log in to QuickBooks Online
Open your browser and navigate to qbo.intuit.com. Sign in with your Intuit credentials. You will need at least the Expenses view permission to access the vendor list and its export options.
Navigate to the Vendors page
From the left-hand navigation menu, click on Expenses and then select Vendors. This opens your complete vendor list showing each vendor's name, phone number, email, open balance, and other details. You can sort or search the list to verify the vendors you want to export.
Click the Export button
At the top-right corner of the Vendors page, locate the Export icon (a box with an upward arrow) next to the Print icon. Click it and select Export to Excel. The vendor list will download as an Excel file containing names, contact information, addresses, and balances.
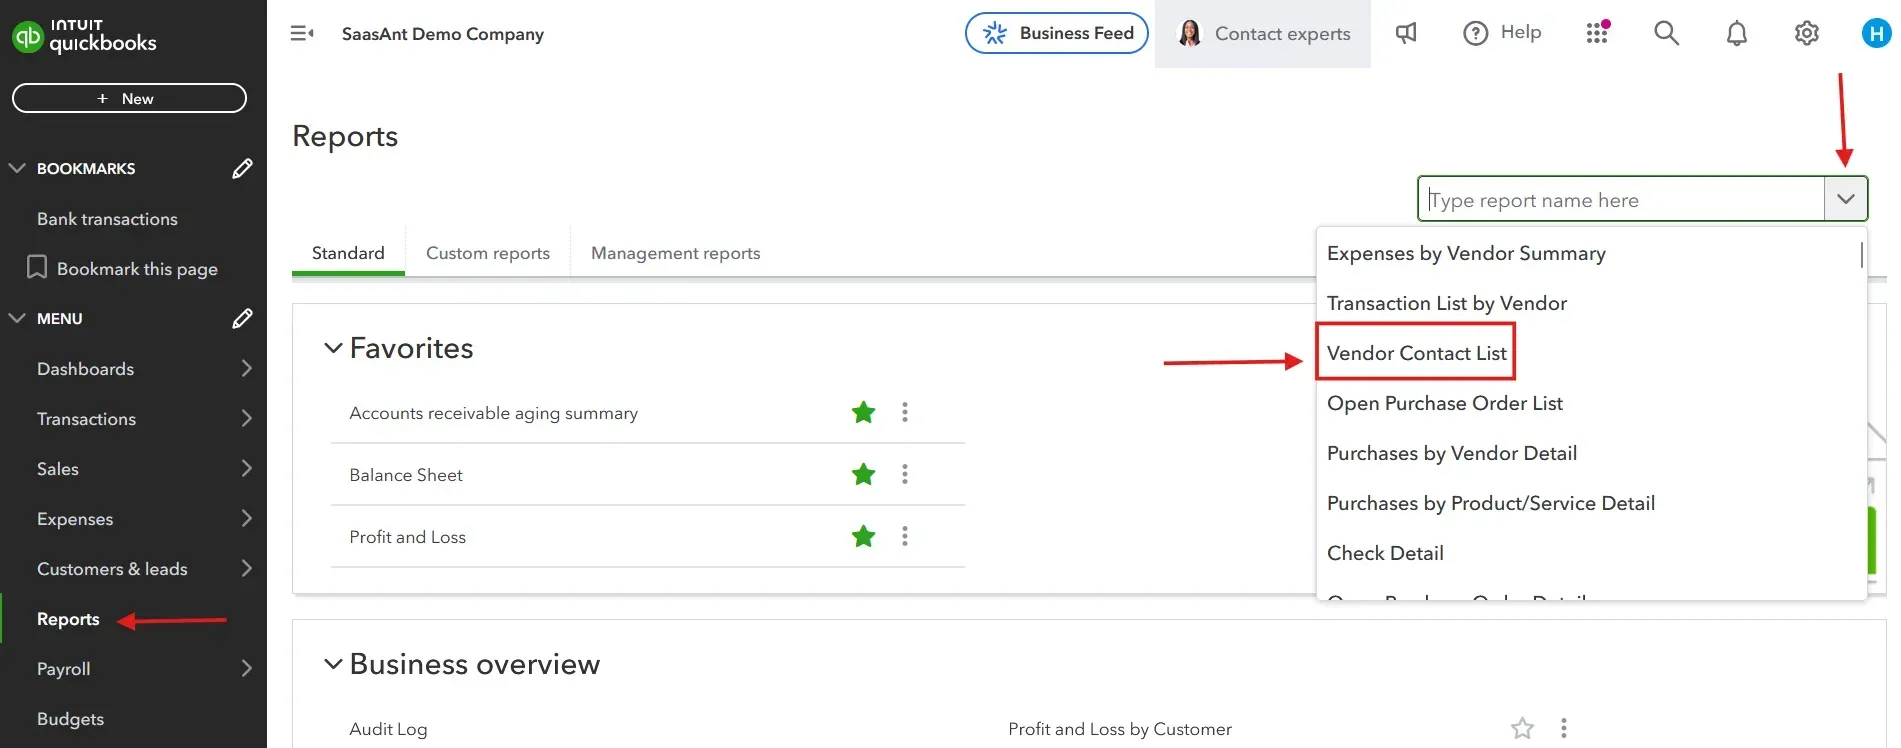
Alternative: Use the Vendor Contact List report
For a more comprehensive export, go to Reports from the left navigation. Search for Vendor Contact List and open it. This report includes fields like vendor name, company, full address, phone, email, account number, and other contact details that may not appear in the quick export.
Customize the report (optional)
Click the Customize button at the top of the report to add or remove columns. You can include the Tax ID, payment terms, 1099 tracking status, and notes fields. Set your preferred date range if you want to filter by vendor activity, then click Run Report.
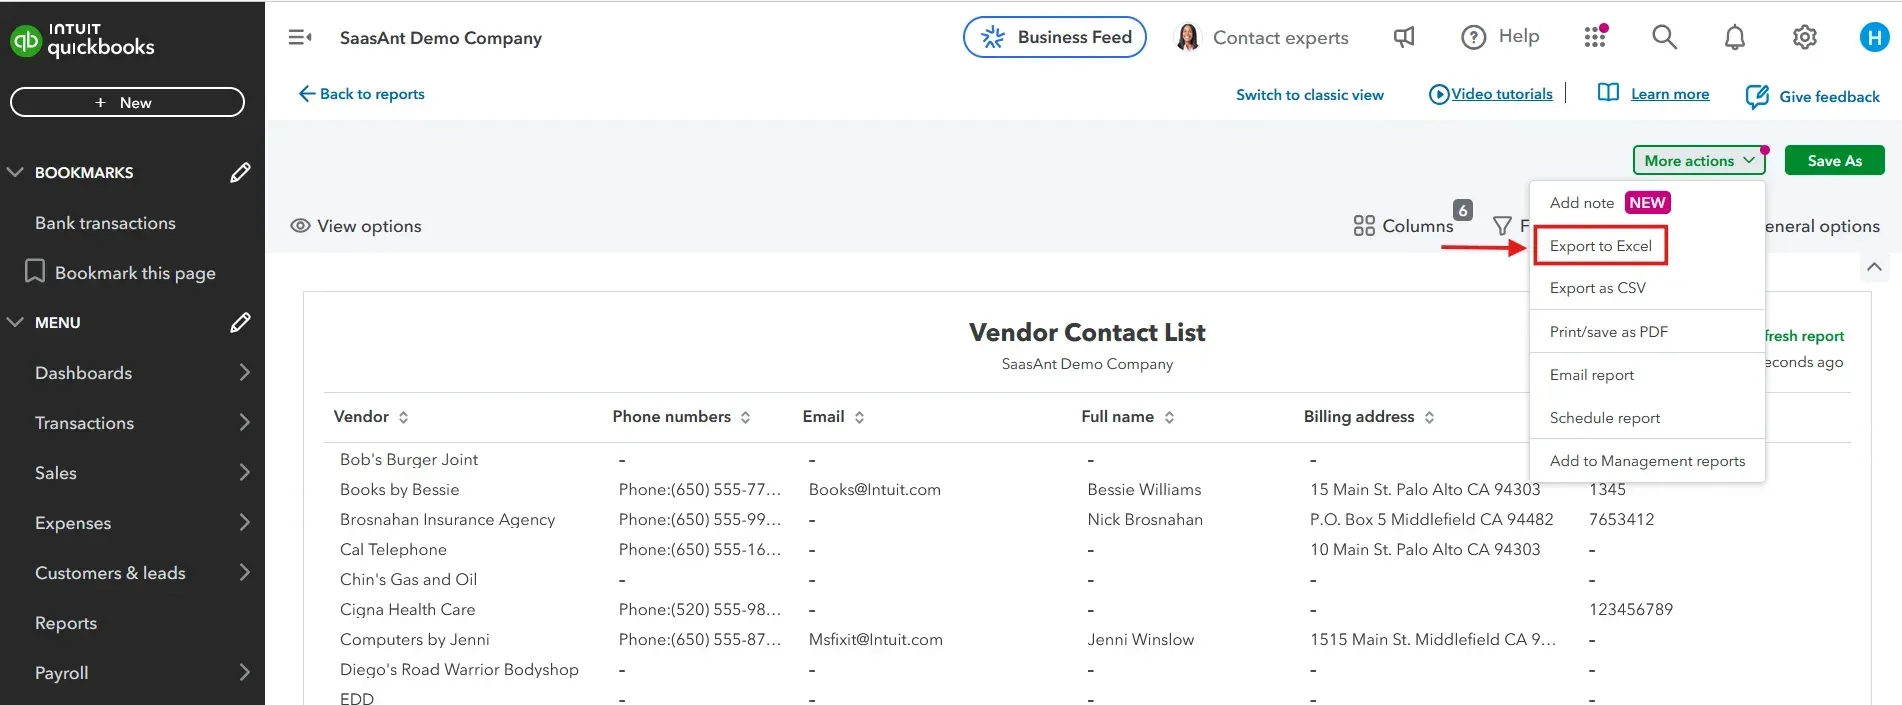
Export the report to Excel
Once the report looks correct, click the Export icon in the top-right corner and select Export to Excel. The file downloads to your browser's default downloads folder as an Excel workbook. This report-based export typically includes more columns than the quick vendor list export.
Convert to CSV and review
Open the downloaded Excel file and save it as a CSV file using File then Save As and selecting the CSV format. Review the data to ensure all vendor records and key fields like names, addresses, and Tax IDs exported correctly. The file is now ready for use with our converter tool.
Required Vendor Export Fields
| Field | Type | Description | Example |
|---|---|---|---|
| Vendor | Text | Vendor display name (unique identifier) | Office Supplies Inc |
Your QuickBooks Online export must include these fields for successful conversion.