How to Import Products to PrestaShop (2026 Guide)
After converting your data with one of our tools, follow these steps to import the products into PrestaShop.
Import Steps
Download the PrestaShop sample CSV
Log in to your PrestaShop back office and navigate to Advanced Parameters, then Import. PrestaShop offers sample CSV files for each entity type that can be imported. Download the Products sample file to use as a template. Open it in Excel, LibreOffice, or Google Sheets to review the expected columns.

Prepare your product data
Fill in the CSV with your product information. The Name field is required for new products and the Reference (SKU) field is strongly recommended for updates. Price tax excluded is a required field. Set Active to 1 for published products or 0 for inactive/hidden products.
Add categories, images, and descriptions
Enter category paths as comma-separated values in the Categories column. Add publicly accessible image URLs in the Image URLs column, separated by commas or semicolons. Fill in the Summary for a short description and Description for the full product details, which can include HTML formatting.
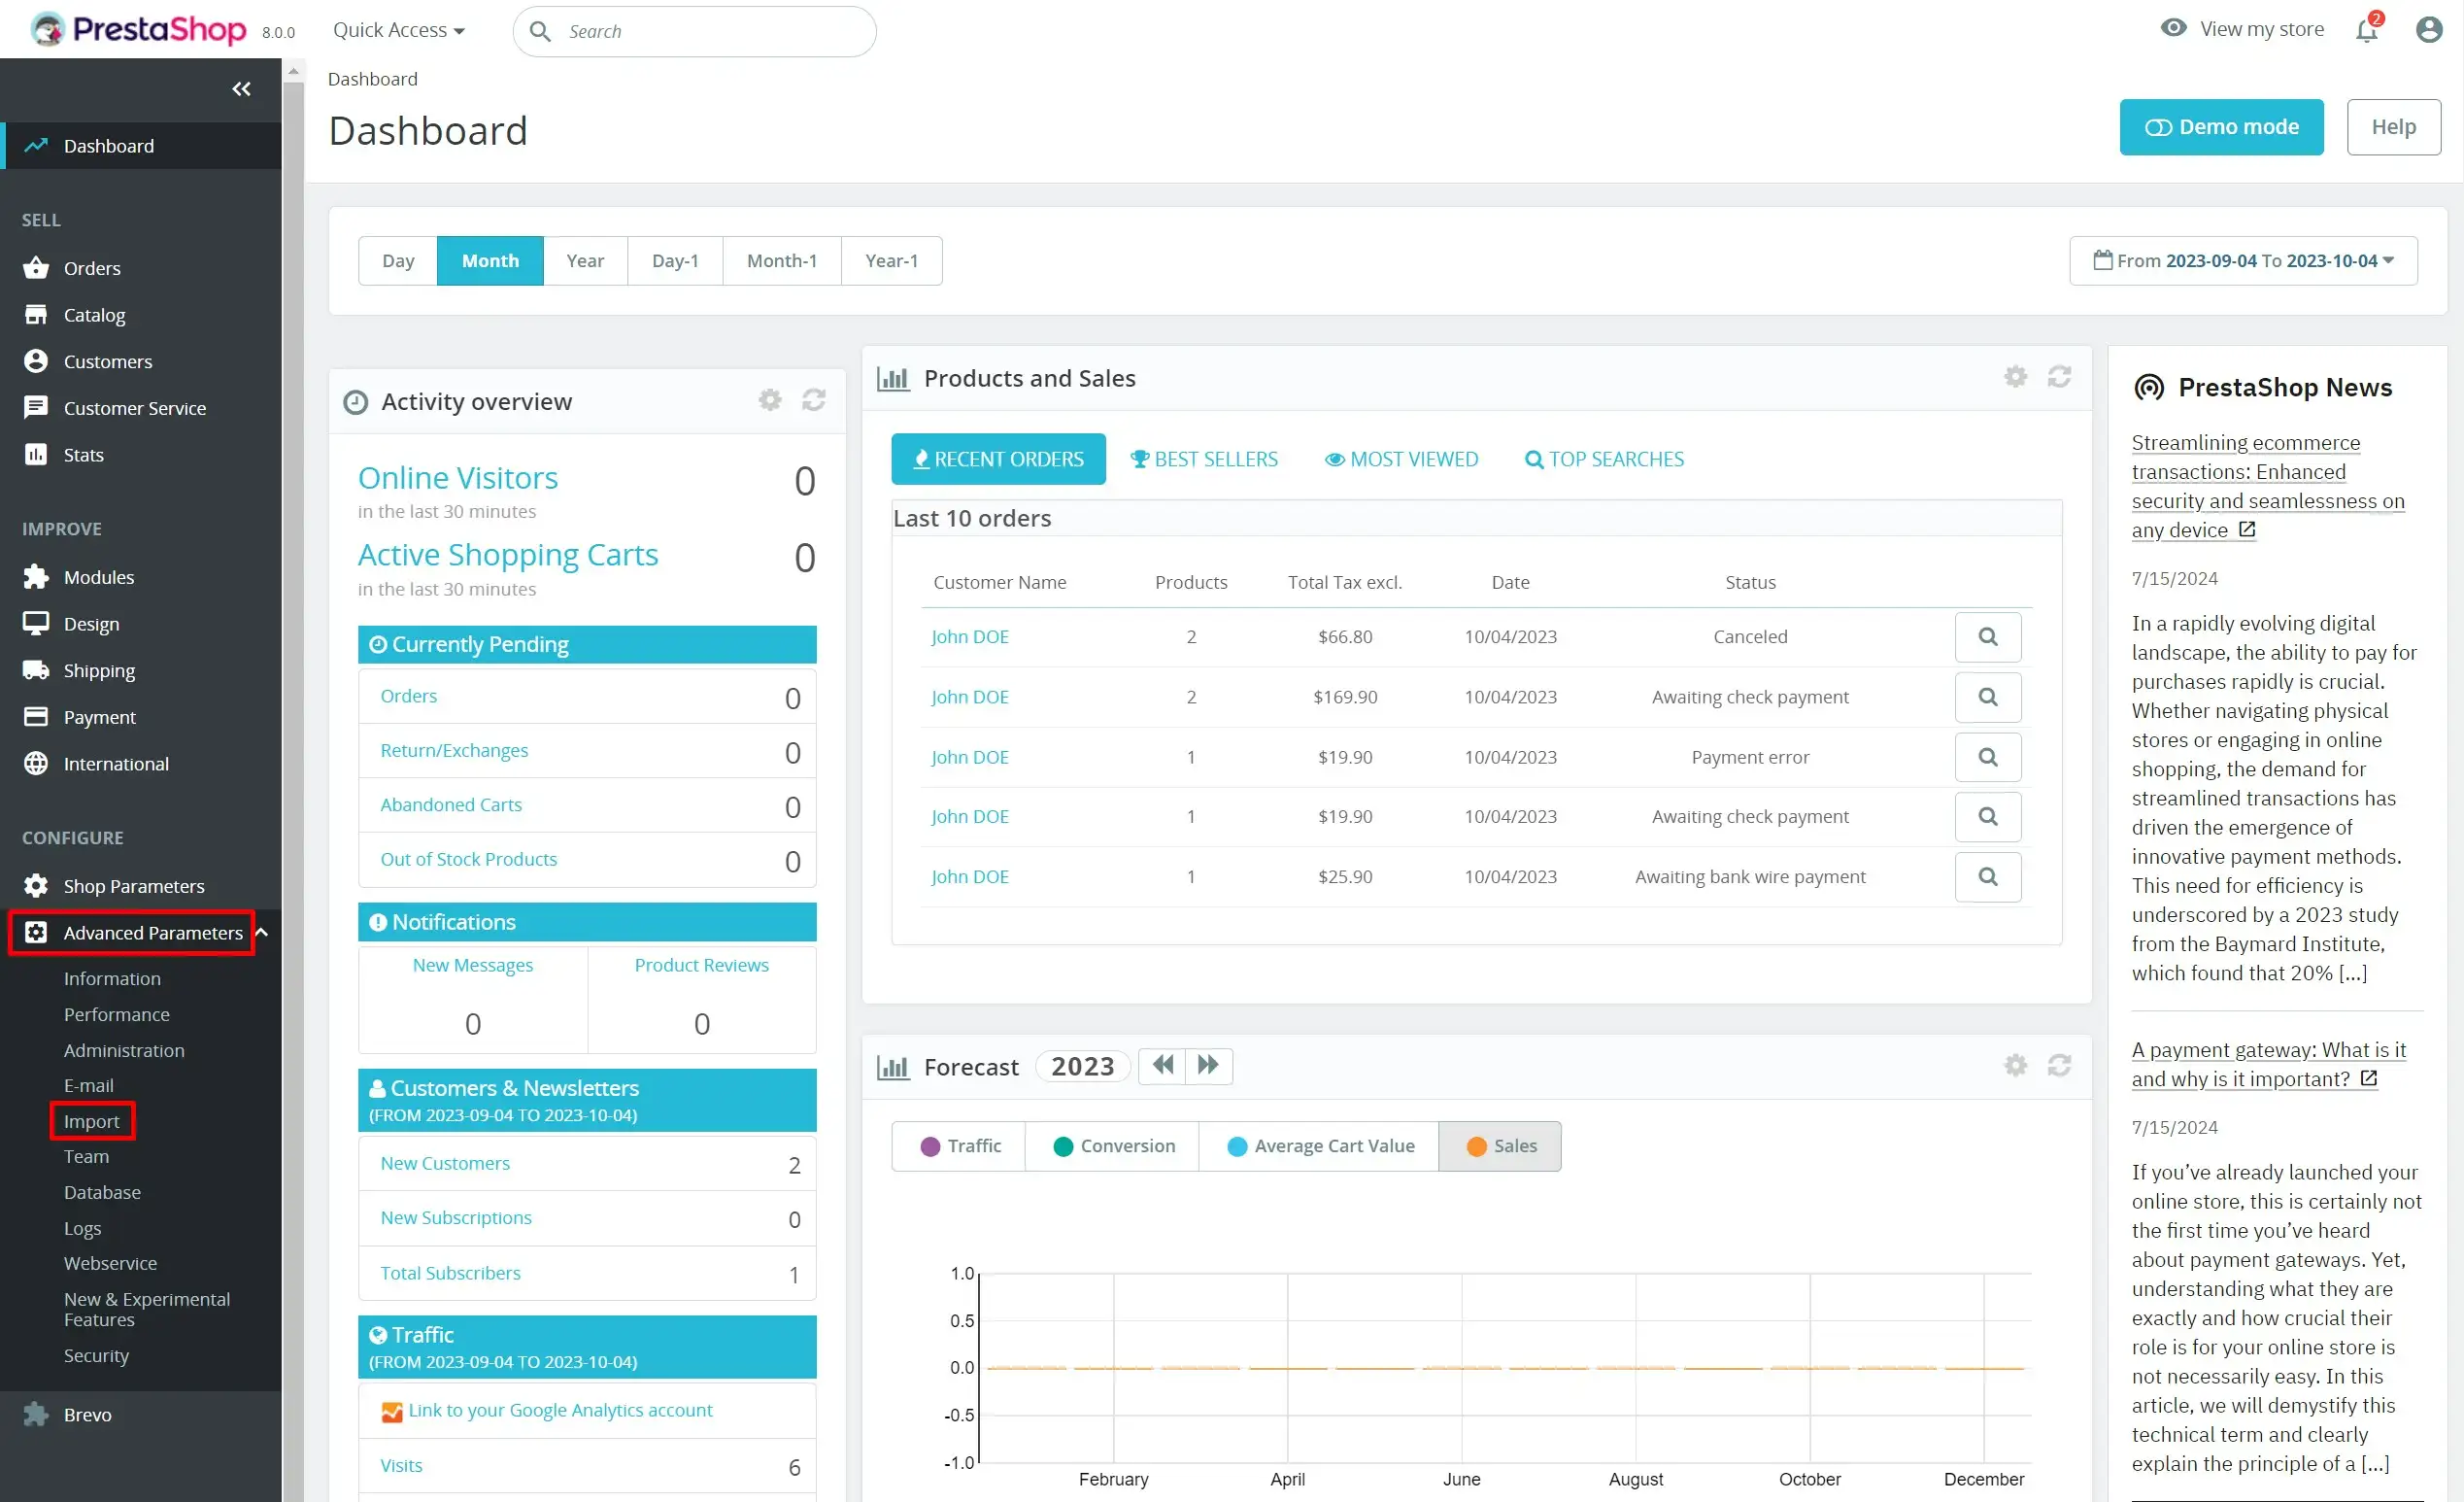
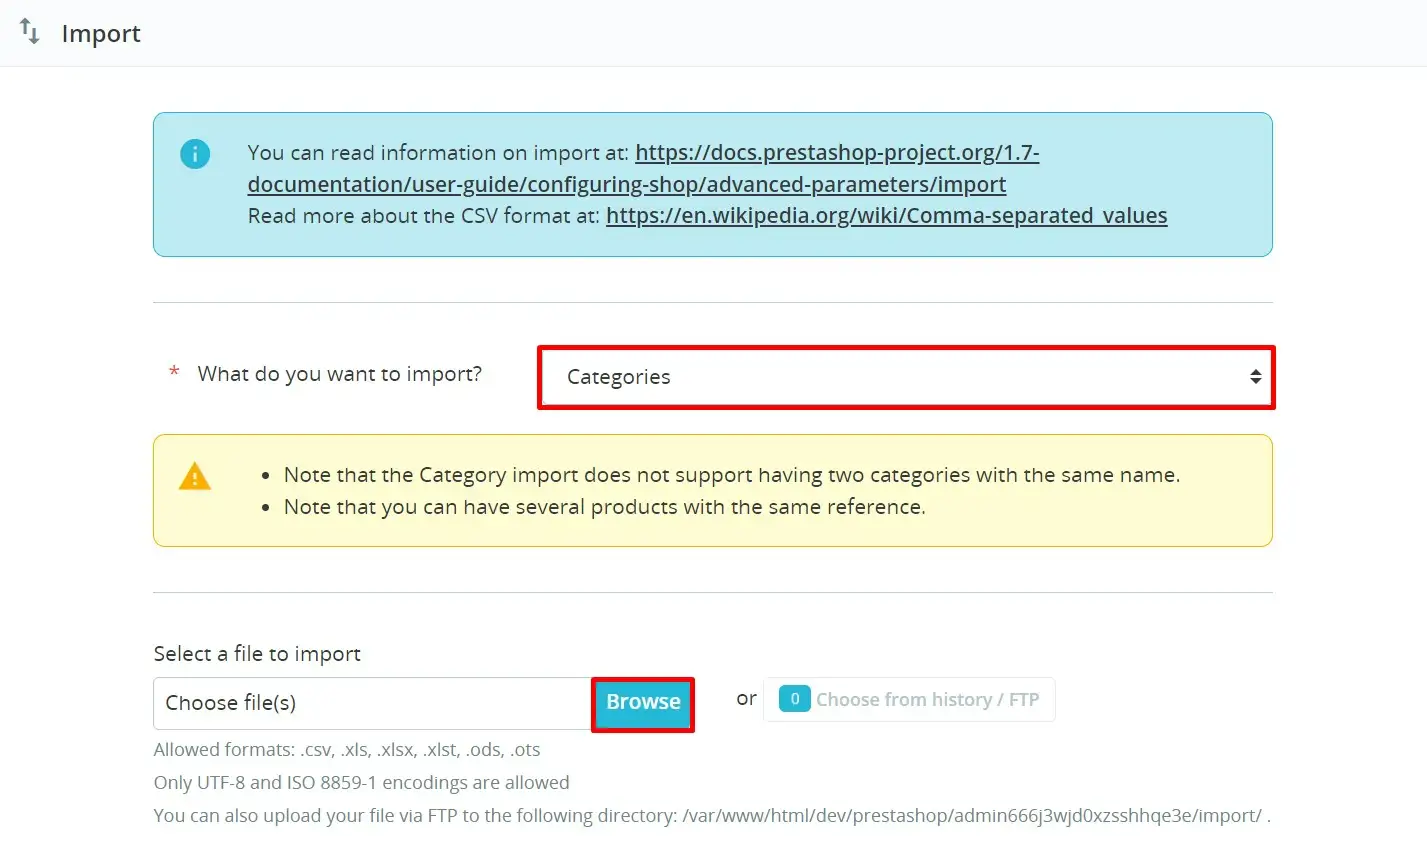
Access the import tool
In the PrestaShop back office, go to Advanced Parameters, then Import. Select Products from the 'What do you want to import?' dropdown. Click Choose File to select your prepared CSV.
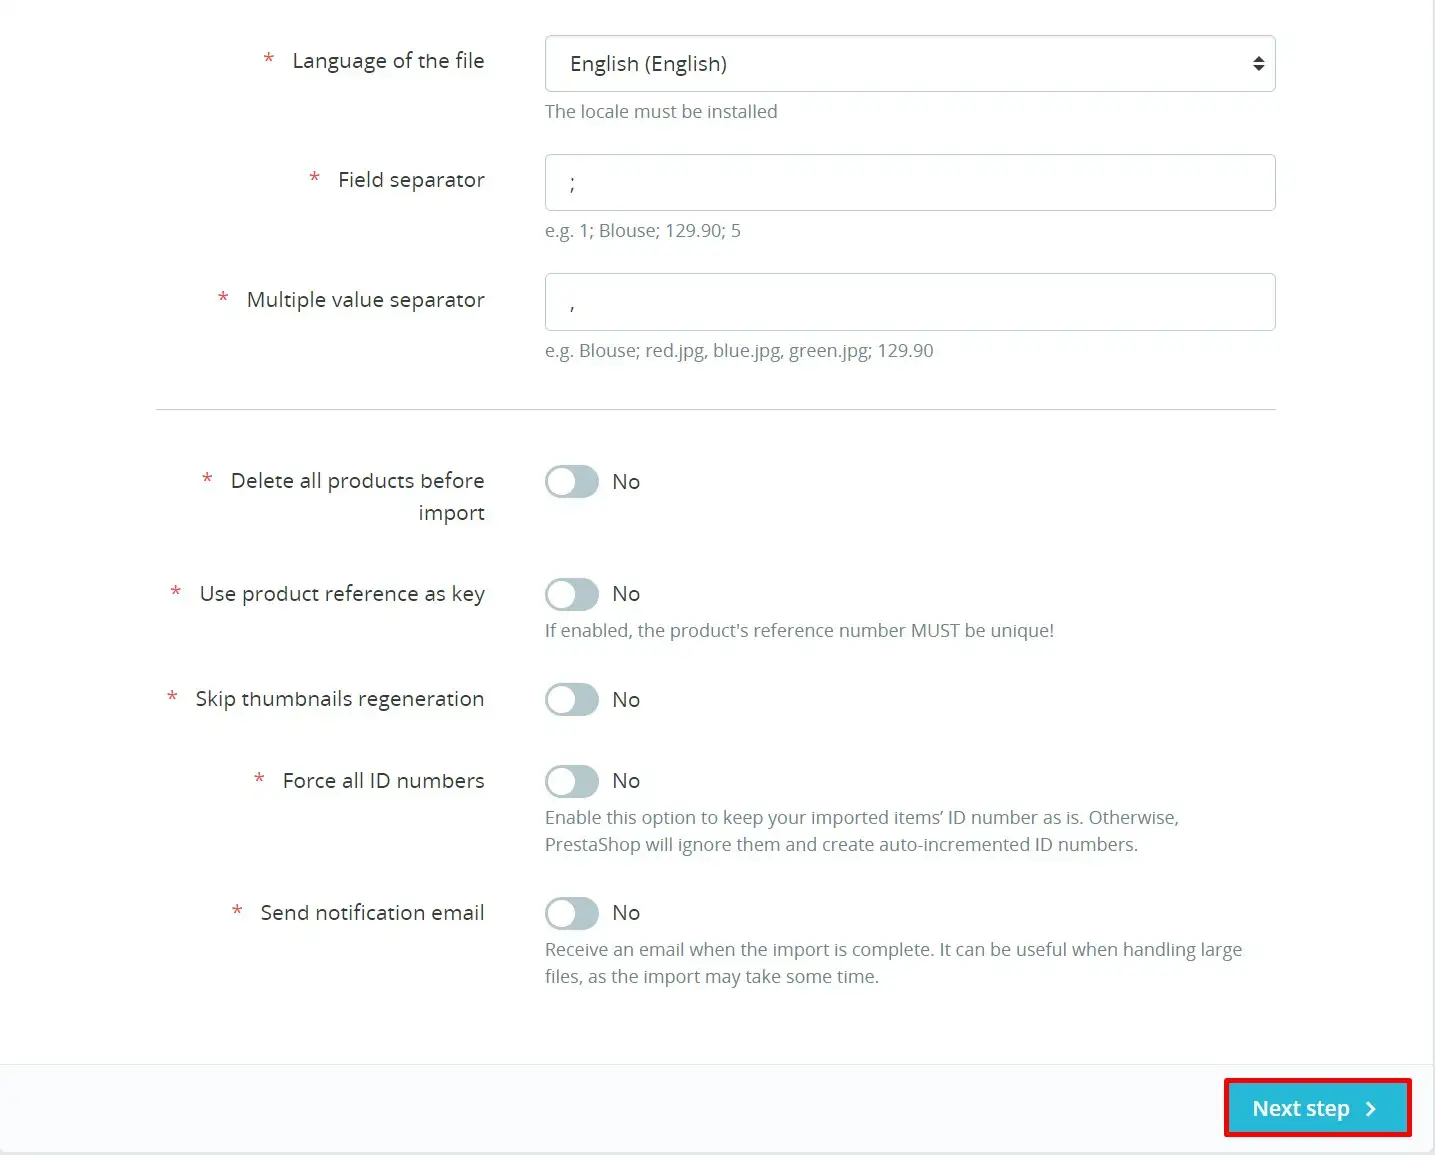
Configure import settings
Set the correct field separator (semicolon by default) and multi-value separator. If you want to start fresh, you can enable the option to delete all existing products before import, but use this with extreme caution. Verify the language setting matches your CSV data.
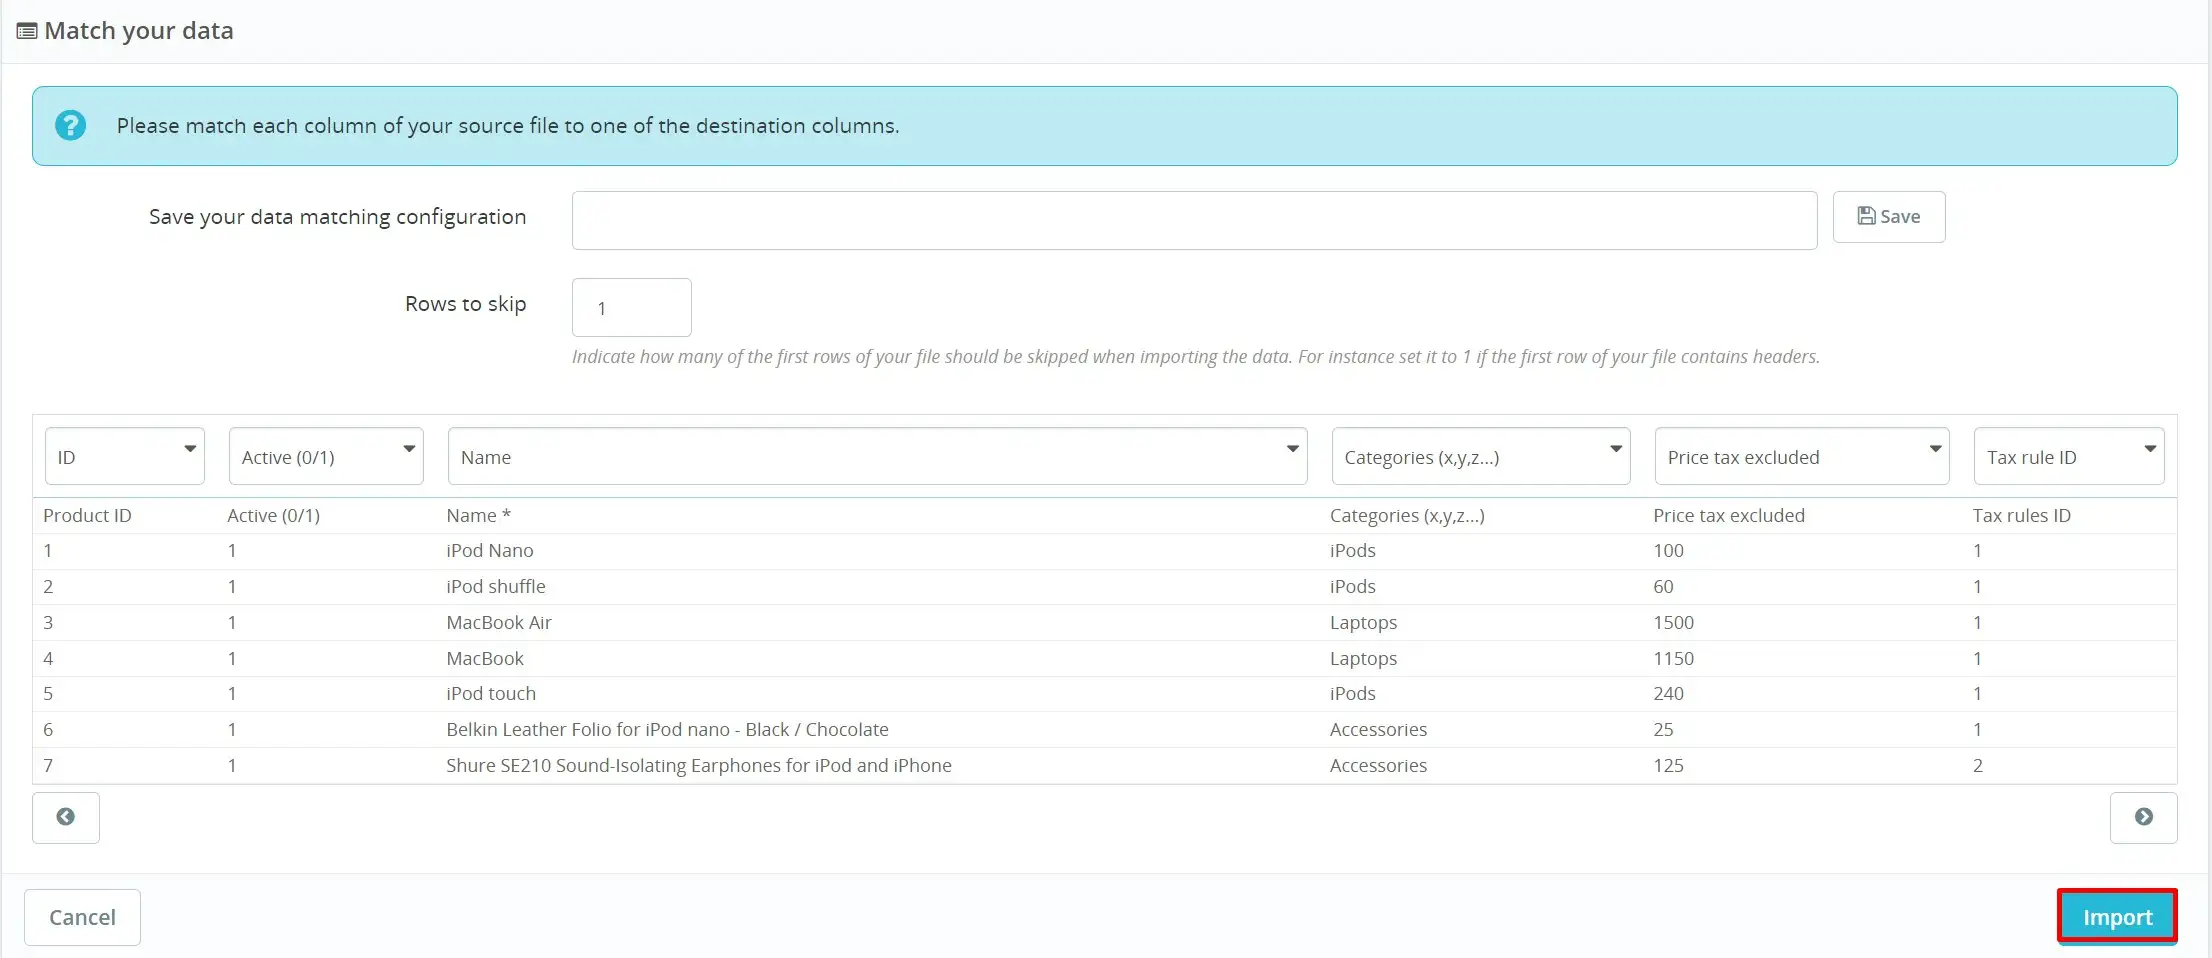
Map data fields
PrestaShop displays a mapping screen where each CSV column is matched to a database field. Verify that all columns are correctly mapped, especially Name, Price, Reference, and Categories. Adjust any incorrect mappings using the dropdown menus.
Run the import
Click Import to start processing. A progress bar will show the validation and import progress. The process will display '100% validated' and '100% imported' when complete. Do not close the browser tab during the import.
Verify imported products
Navigate to Catalog, then Products in the PrestaShop back office to review your imported products. Check that names, prices, descriptions, images, and categories all imported correctly. Visit your storefront to verify that active products appear as expected to customers.
Required PrestaShop Fields
| Field | Type | Description | Example |
|---|---|---|---|
| Name | Text | Product name | Blue Cotton T-Shirt |
| Price tax excluded | Currency | Product price without tax | 29.99 |
PrestaShop requires these fields for successful import.