How to Import Cash Sale to NetSuite (2026 Guide)
After converting your data with one of our tools, follow these steps to import the cash sale into NetSuite.
Import Steps
Verify customers and items exist in NetSuite
Before importing cash sales, confirm that every customer and item referenced in your CSV already exists in NetSuite. Cash sale imports require exact matches for the Customer field (by name or internal ID) and the Item field (by SKU or name). Open Lists > Relationships > Customers and Lists > Accounting > Items to verify your records.
Open the CSV Import Assistant
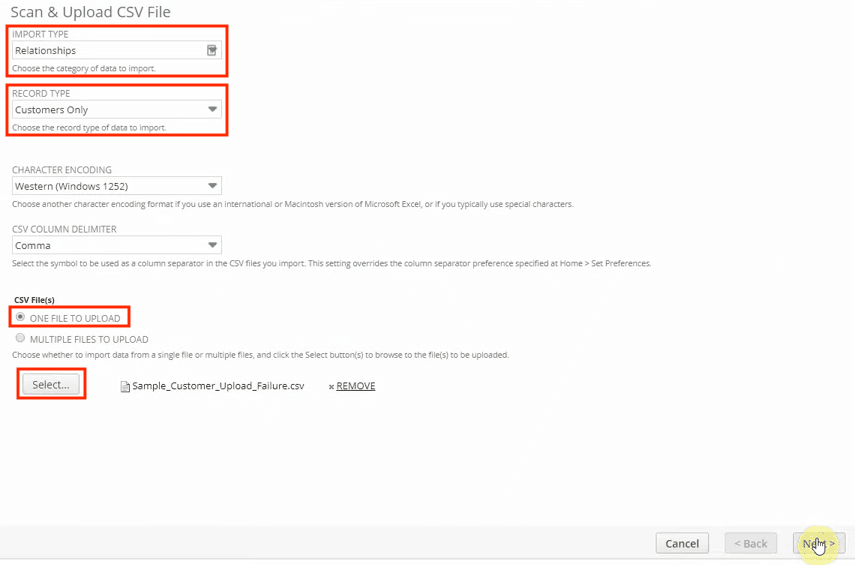
Navigate to Setup > Import/Export > Import CSV Records. On the Import Assistant page, set the Import Type to Transactions and the Record Type to Cash Sale. This tells NetSuite which record template and required fields to expect from your upload.
Prepare your CSV file with header and line-item rows
Structure your CSV so that header fields (External ID, Customer, Date, Memo) appear on the first row of each cash sale, and line-item fields (Item, Quantity, Rate, Amount) repeat on subsequent rows for the same transaction. Each cash sale is grouped by its External ID. Download the NetSuite template from the import page if you need a reference for column order.
Upload the CSV and select character encoding
Click Select to browse for your CSV file, then choose it and click Open. Select the correct character encoding for your file (UTF-8 is the standard default). Click Next to proceed to the field mapping step.

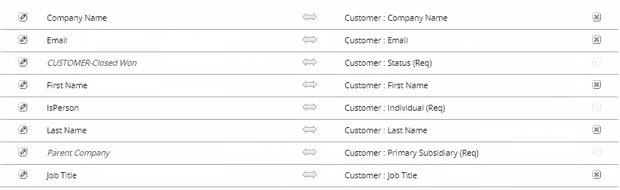
Map CSV columns to NetSuite cash sale fields
NetSuite will auto-map columns whose names match known fields. Review each mapping to ensure Customer maps to the Cash Sale Customer field, Item maps to Line Item, and Amount maps to Line Amount. Drag and drop to fix any mismatches. You can also set default values for fields like Currency or Location if they are not included in your CSV.
Run a test import with a small batch
Select two or three cash sales from your CSV and import them as a test batch. Open the resulting cash sale records in NetSuite and verify that line items, quantities, rates, and totals are correct. Check that tax codes applied properly and the customer association is accurate.
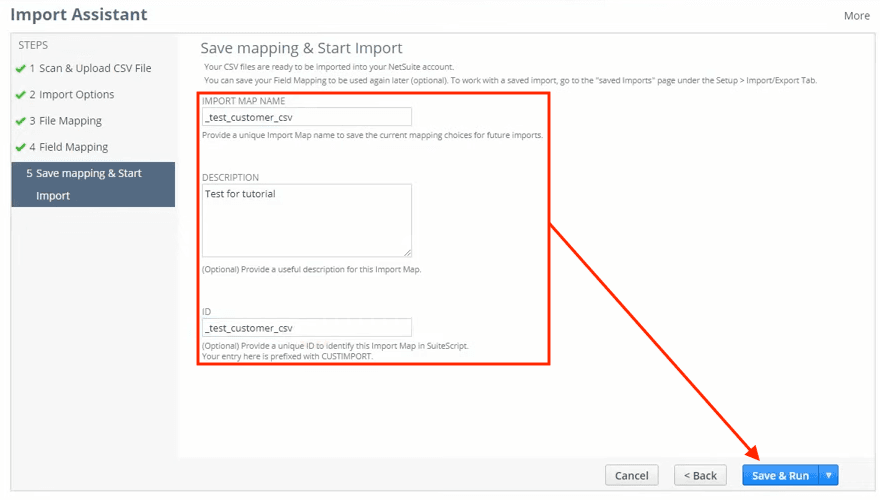
Import the full CSV file
After validating your test batch, return to the Import Assistant, upload the complete CSV, re-apply your saved field mapping, and click Run. NetSuite processes the file and creates cash sale transactions for each grouped set of rows.
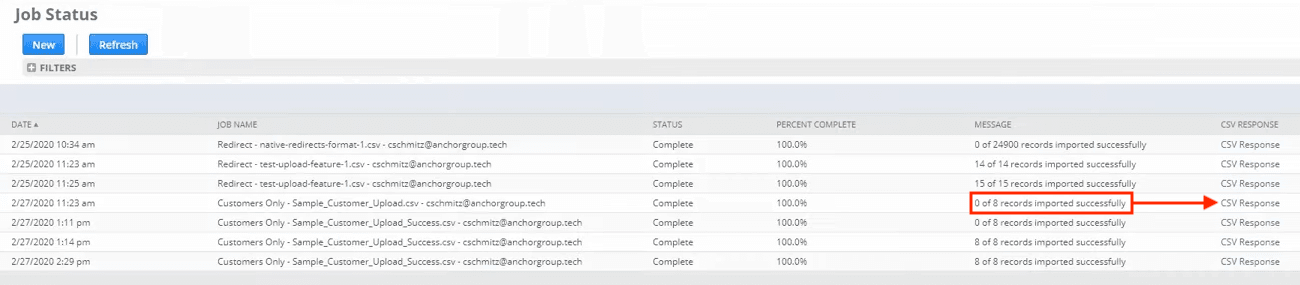
Review import results and resolve errors
Check the Job Status page for the import results. If errors occurred, download the CSV Response file to see which rows failed and why. Common issues include unrecognized item names, missing customers, and invalid tax codes. Fix the errors in your CSV and re-import only the failed records.
Required NetSuite Fields
| Field | Type | Description | Example |
|---|---|---|---|
| External ID | Text | Unique identifier (order number, transaction ID) | SHOPIFY-1001 |
| Customer | Text | Customer name or internal ID (must exist in NetSuite) | John Doe |
| Date | Date | Transaction date (MM/DD/YYYY) | 01/15/2025 |
| Item | Text | Item SKU or name (must exist in NetSuite) | WIDGET-001 |
| Quantity | Number | Item quantity | 2 |
| Amount | Currency | Line total (Quantity × Rate) | 99.98 |
NetSuite requires these fields for successful import.