How to Import Books Contact to Zoho Books (2026 Guide)
After converting your data with one of our tools, follow these steps to import the books contact into Zoho Books.
Import Steps
Navigate to the Contacts import page
Log in to Zoho Books and click Contacts in the left sidebar to open your contacts list. Click the More icon (three dots) in the top-right corner and select Import Contacts from the dropdown menu.
Upload your contact CSV file
Click Choose File and select your CSV, TSV, or XLS file containing contact records. The file size must not exceed 10 MB. You can download the sample file from this page to see the expected column format before preparing your own data.
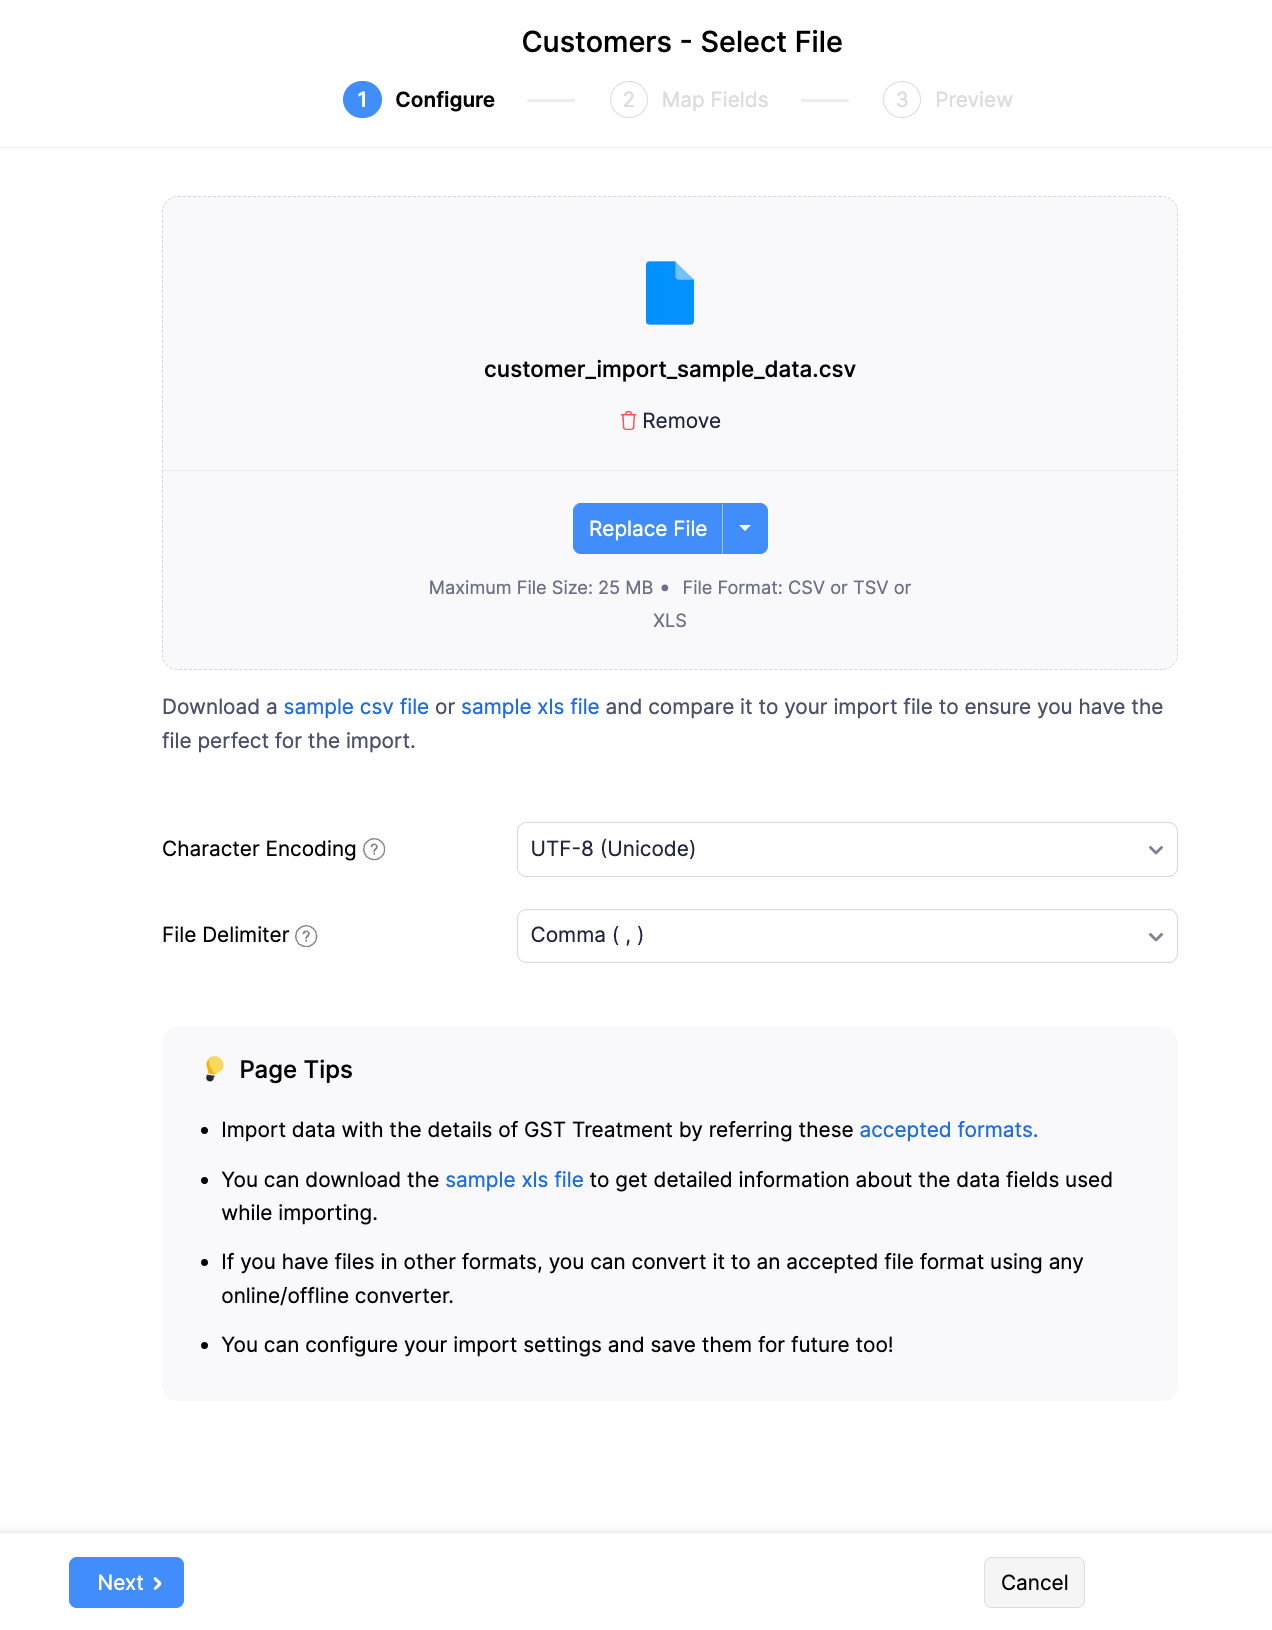
Configure encoding and delimiter settings
On the Configure tab, select the character encoding that matches your file (UTF-8 is the default for most files). Choose the correct field delimiter for CSV files (comma is standard). Click Next to proceed to field mapping.
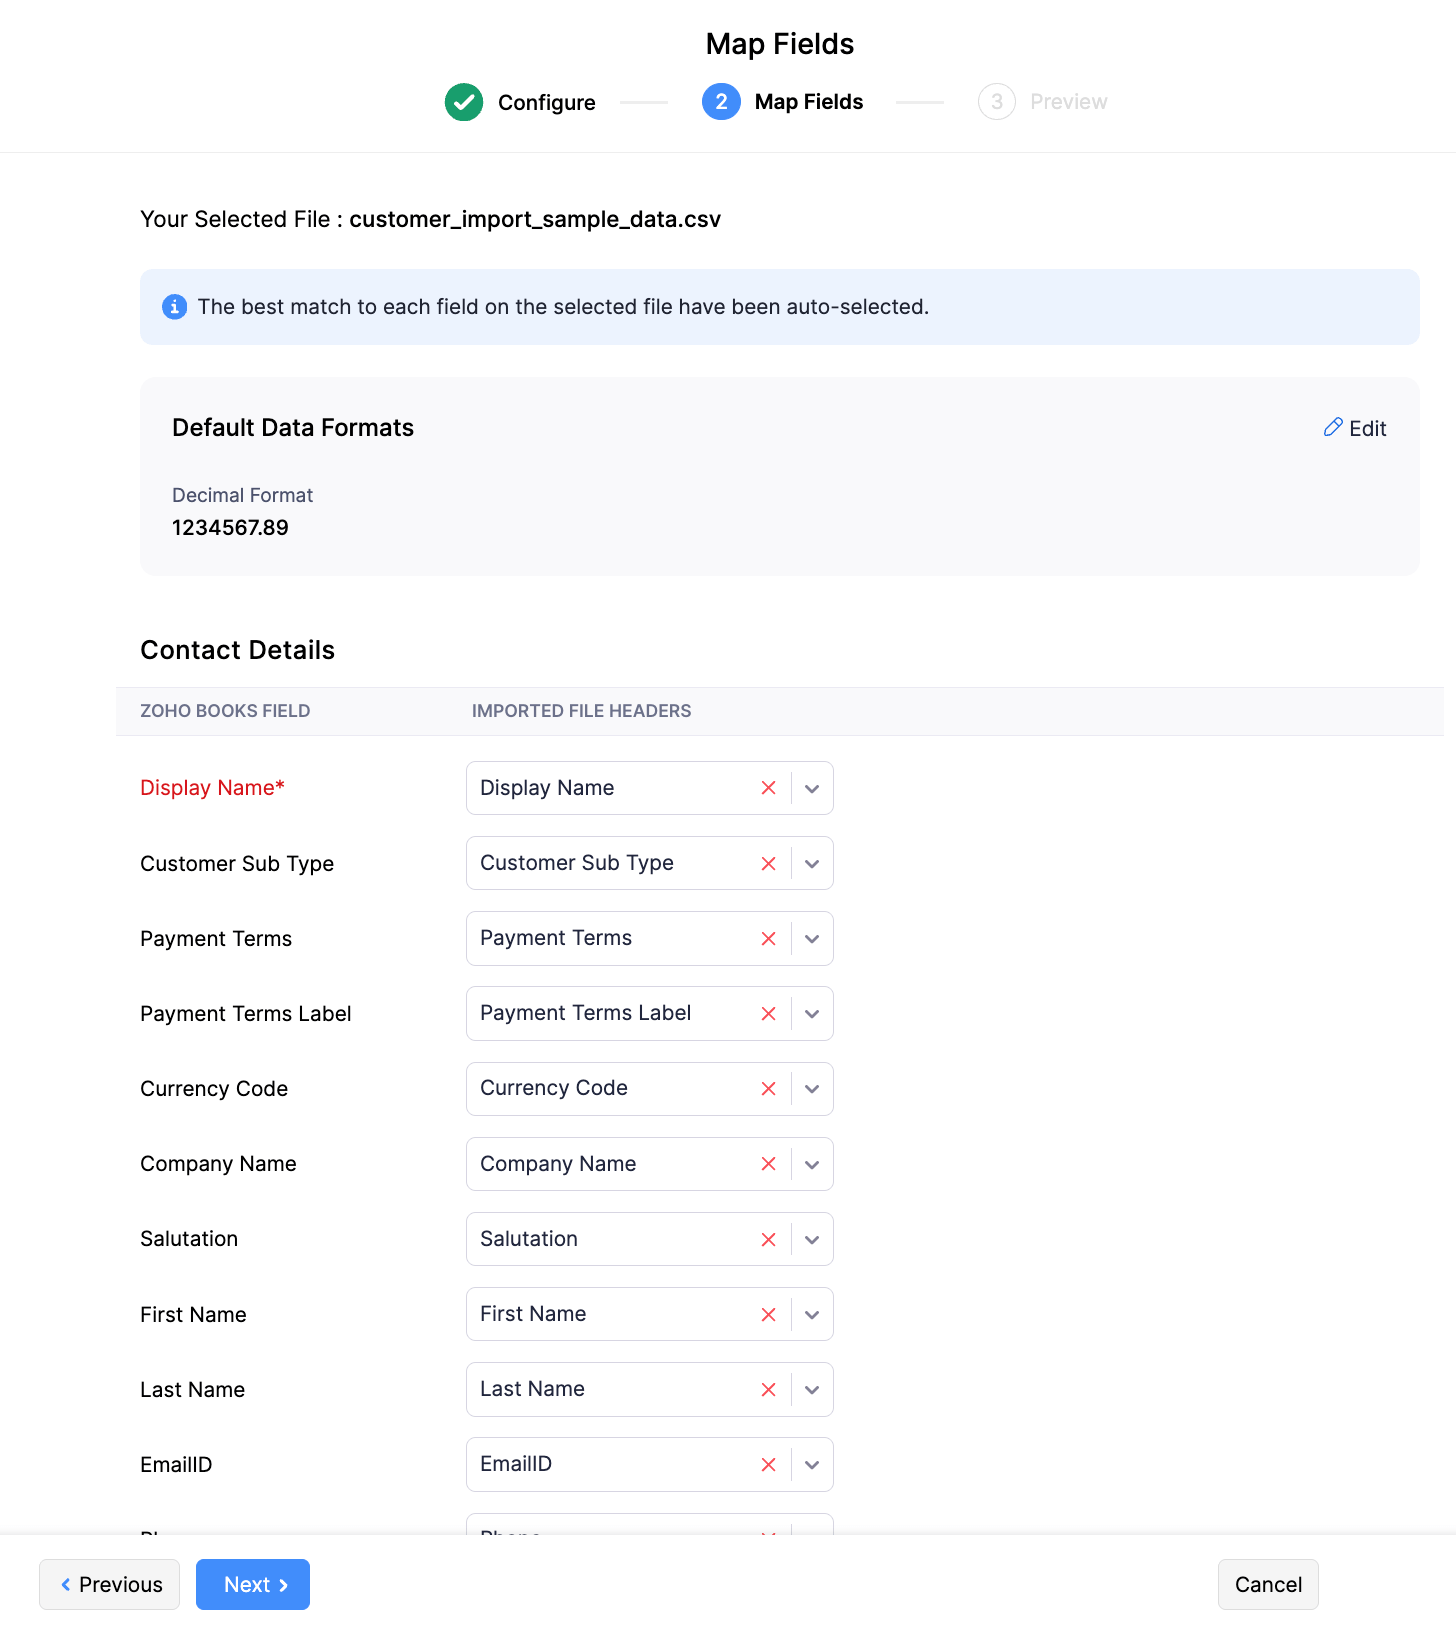
Map CSV columns to Zoho Books contact fields
On the Map Fields page, verify that your CSV columns are correctly mapped to Zoho Books fields. Contact Name is the primary required field. Map additional fields like Company Name, Email, Phone, Billing Address, and Shipping Address as needed. Use the dropdown menus to correct any auto-mapping errors.
Set the contact type for all records
If your CSV includes a Contact Type column with values like 'customer' or 'vendor', map it to the Contact Type field. If all contacts in your file are the same type, you can set a default value during mapping instead of including a column. This determines whether each record appears under Customers or Vendors in Zoho Books.
Preview and complete the import
On the Preview page, review how your contact data will be imported. Check that names, emails, addresses, and phone numbers are in the correct fields. Click Import to finalize. Zoho Books creates the contact records and you can view them under the Contacts section.
Verify imported contacts
After the import completes, open the Contacts list and spot-check several records. Confirm that billing and shipping addresses, phone numbers, email addresses, and payment terms imported correctly. Edit any records that need corrections directly in Zoho Books.
Required Zoho Books Fields
| Field | Type | Description | Example |
|---|---|---|---|
| Contact Name | Text | Display name (primary identifier) | John Doe |
Zoho Books requires these fields for successful import.