How to Import Invoice to NetSuite (2026 Guide)
After converting your data with one of our tools, follow these steps to import the invoice into NetSuite.
Import Steps
Confirm customer and item records exist in NetSuite
Each invoice row in your CSV references a customer (Entity field) and one or more items. These records must already exist in NetSuite before you import. Go to Lists > Relationships > Customers and Lists > Accounting > Items to verify. You can match customers by name, internal ID, or external ID.
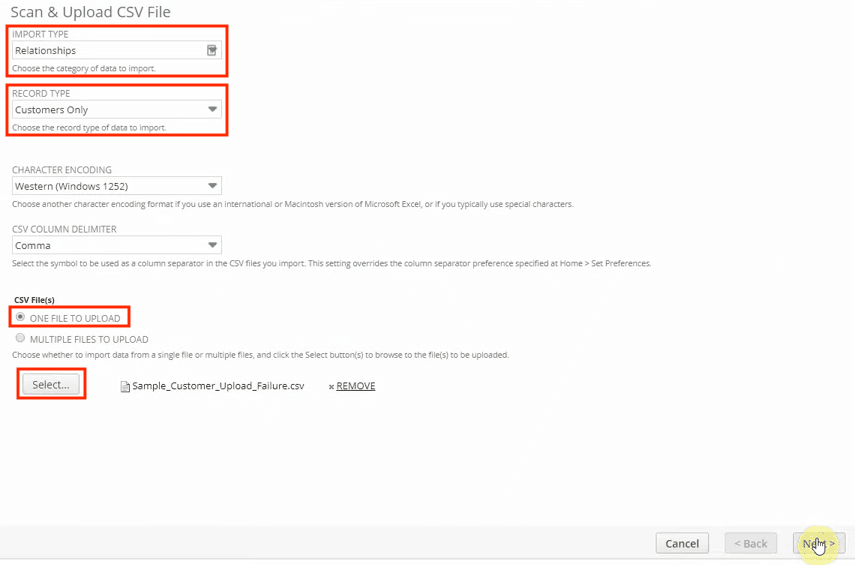
Open the CSV Import Assistant
Navigate to Setup > Import/Export > Import CSV Records. Set Import Type to Transactions and Record Type to Invoice. This configures the import wizard to expect invoice header fields (Entity, Tran Date, Due Date, Terms) and line-item fields (Item, Quantity, Rate, Amount).
Prepare the invoice CSV file
Structure your CSV with header fields on the first row of each invoice and line items on subsequent rows grouped by External ID. Required header fields include External ID, Entity, and Tran Date. Line items require Item, Quantity, and Amount at minimum. Optional fields like Due Date, Terms, Currency, and Tax Code provide richer invoice detail.
Upload the file and select encoding
On the Scan & Upload CSV File page, click Select to browse for your CSV file. Choose the appropriate character encoding (UTF-8 for most files). Click Open, then Next to move to the field mapping step.
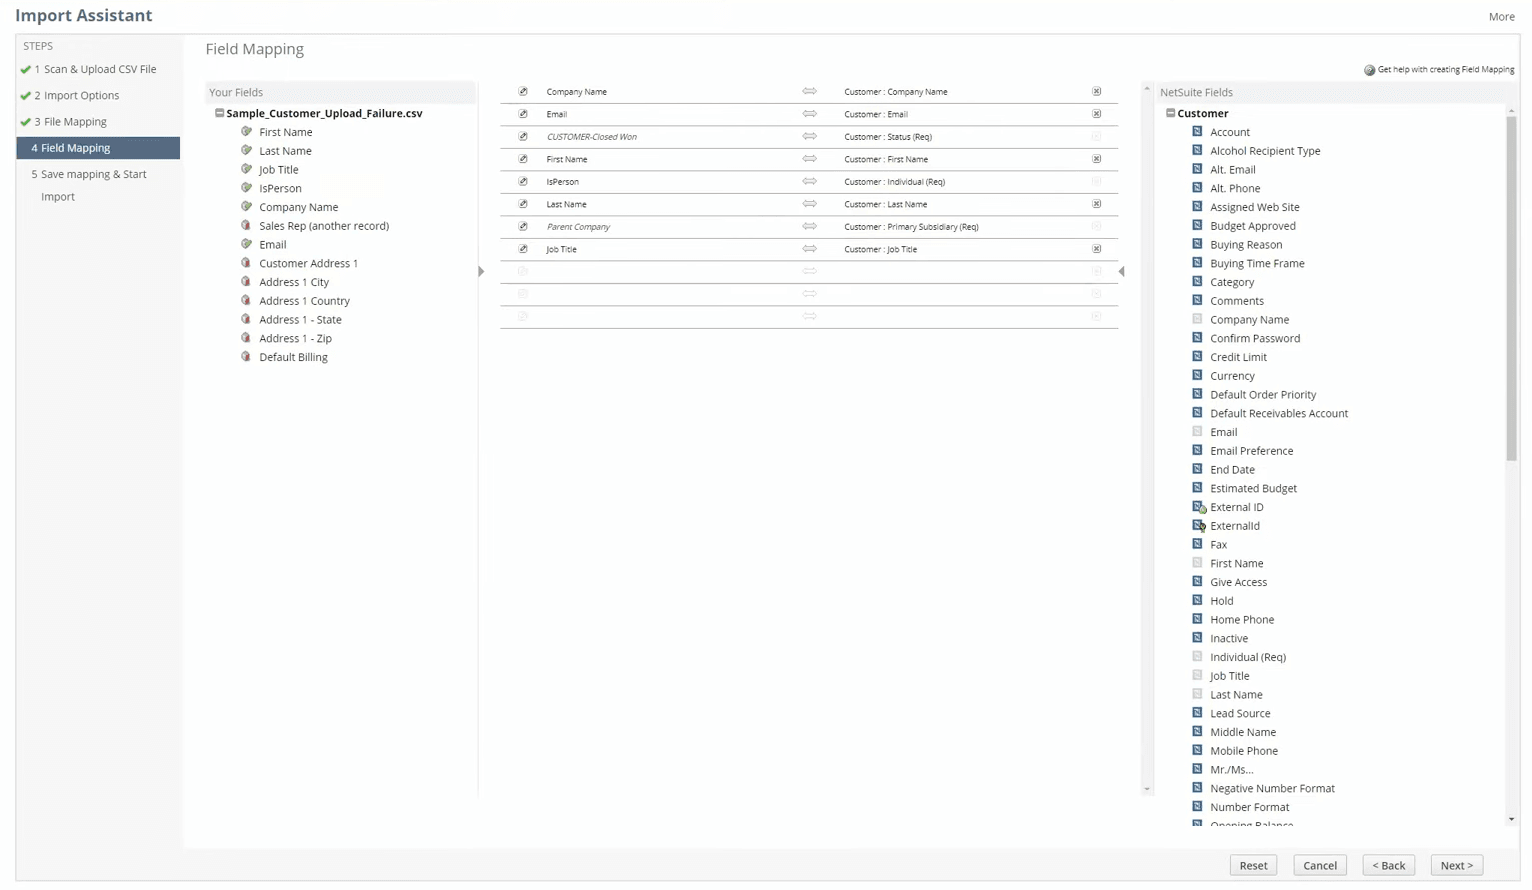
Review and adjust the field mapping
NetSuite auto-maps columns that match known field names. Verify that Entity maps to the Invoice Customer field, Tran Date maps to Date, and Item maps to the line-item Item field. Use drag-and-drop to correct any mismatches and the pencil icon to set default values for unmapped fields like Posting Period or Location.
Test import with a small sample
Import one or two invoices first to validate your mapping. Open the created invoices in NetSuite and confirm the customer, dates, line items, amounts, and payment terms are correct. Check that the Due Date and Terms calculate the expected payment schedule.
Run the full import
After verifying your test batch, upload the complete CSV file, reapply your saved mapping, and click Run. NetSuite processes each row and creates invoice transactions with their associated line items. The invoices will create accounts receivable entries automatically.
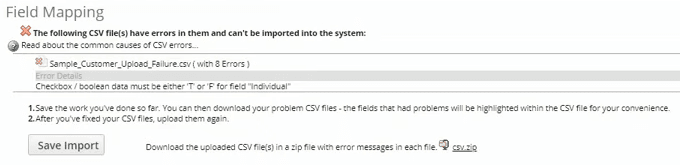
Check results and handle errors
If the import completes successfully, the invoices appear under Transactions > Sales > Invoices. If errors occur, the Job Status page provides a CSV Response file with error details for each failed row. Common errors include mismatched entity names, invalid item references, and unbalanced exchange rates. Correct the CSV and re-import only the failed records.
Required NetSuite Fields
| Field | Type | Description | Example |
|---|---|---|---|
| External ID | Text | Unique invoice identifier | INV-1001 |
| Entity | Text | Customer name or internal ID | Acme Corporation |
| Tran Date | Date | Invoice date (MM/DD/YYYY) | 01/15/2025 |
| Item | Text | Item SKU or name | SERVICE-MONTHLY |
| Quantity | Number | Item quantity | 1 |
| Amount | Currency | Line total | 999.00 |
NetSuite requires these fields for successful import.