How to Export Flat File Generic from Amazon Seller (2026 Guide)
Follow these steps to export your Amazon Seller flat file generic as a CSV file. Once exported, you can use any of our converter tools to transform the data for your target system.
Export Steps
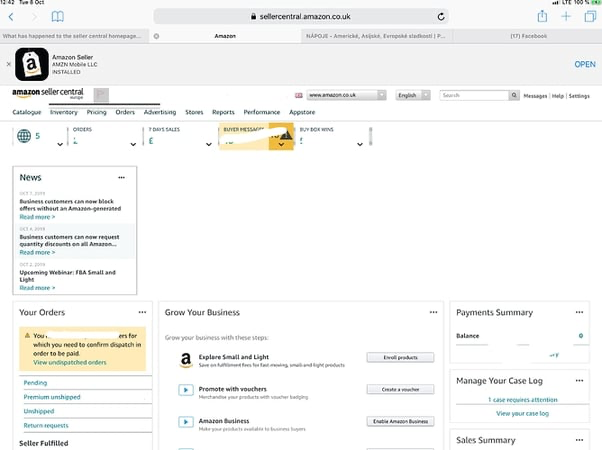
Log in to Amazon Seller Central
Open sellercentral.amazon.com in your web browser and sign in with your seller account credentials. Complete any two-factor authentication steps if prompted. Confirm you are operating in the correct marketplace for the products you plan to manage.
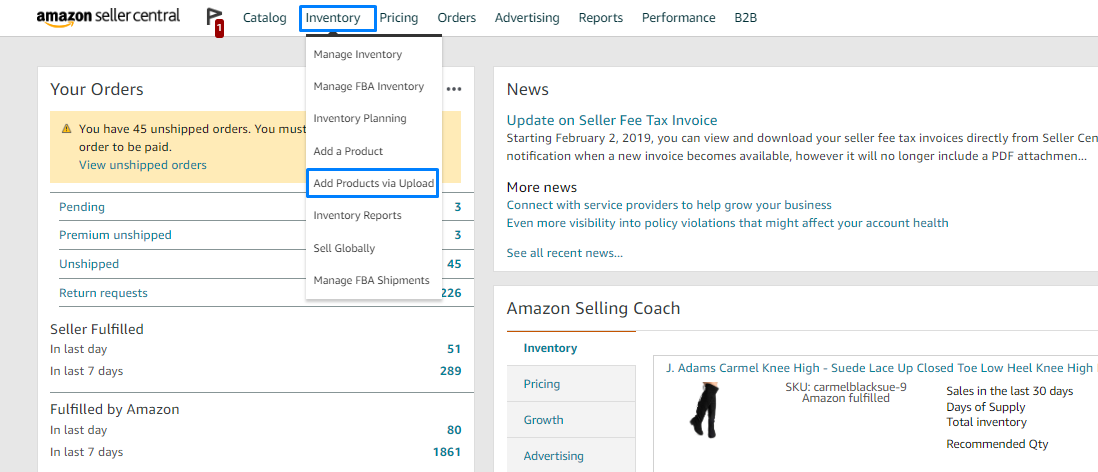
Navigate to Add Products via Upload
From the top navigation bar, hover over 'Inventory' (or use the hamburger menu on the left). Click 'Add Products via Upload' from the dropdown. This opens the bulk upload interface where you can download templates, upload inventory files, and check processing reports.
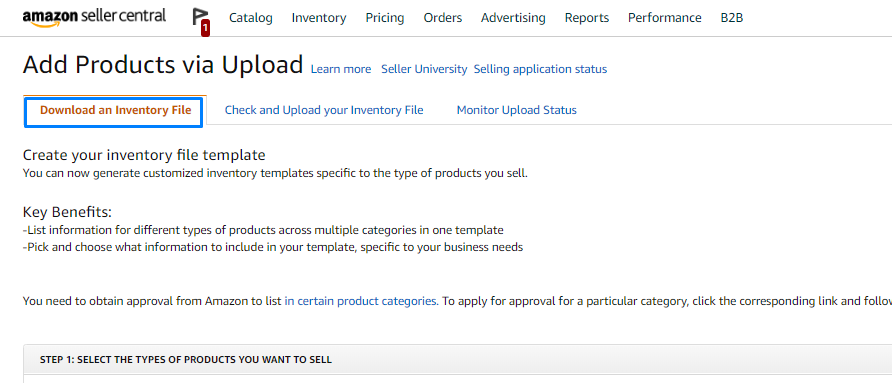
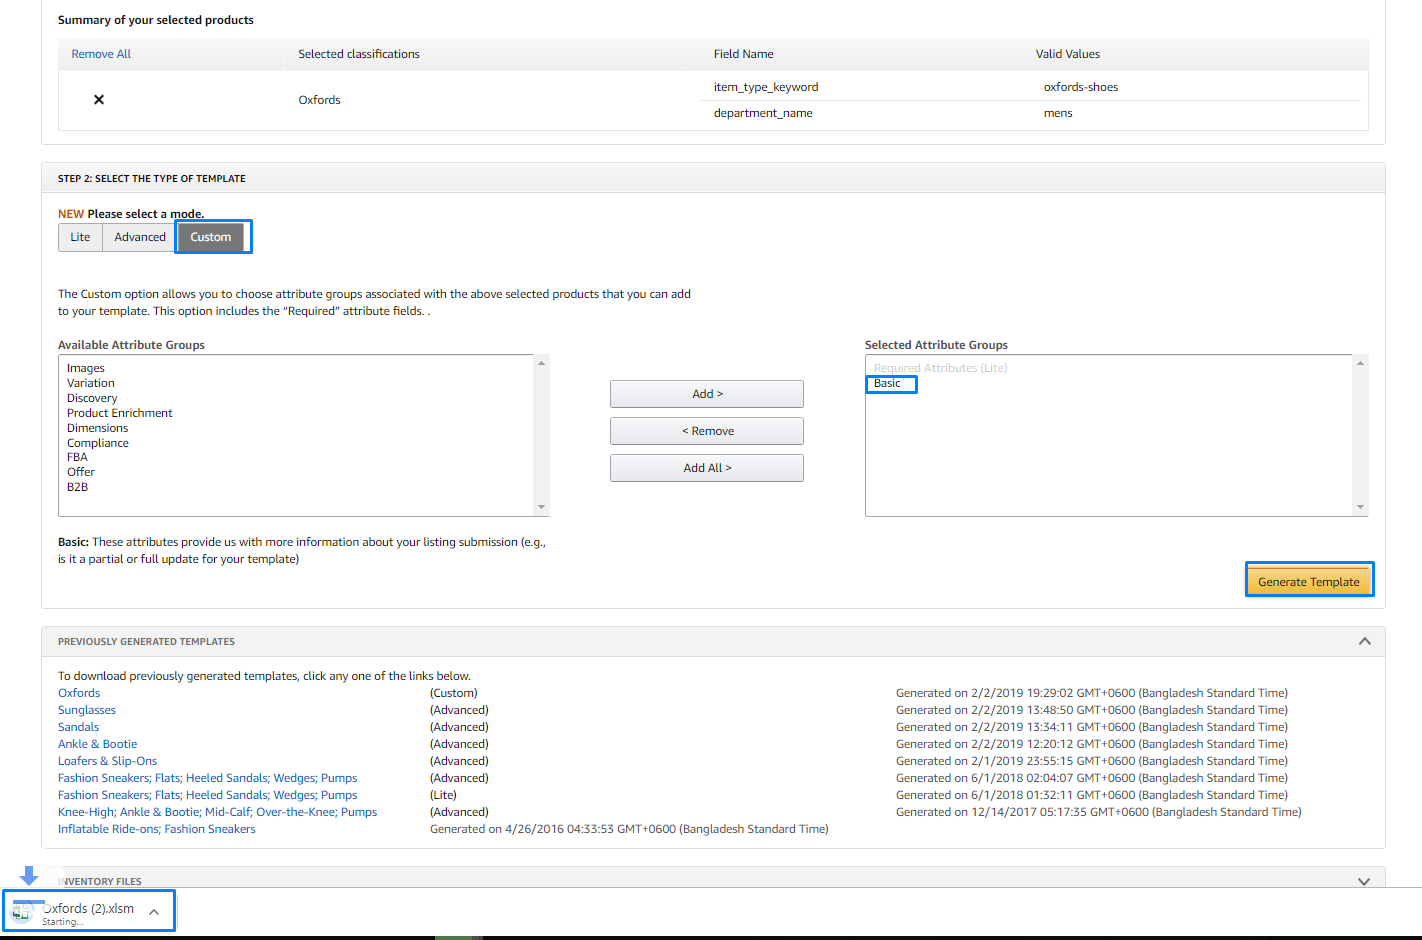
Select Download an Inventory File
On the Add Products via Upload page, click the 'Download an Inventory File' tab. You will see options for different template types including 'Category-Specific Inventory Files' and 'Listing Loader'. For a general-purpose template that works across all categories, select the generic inventory file option.
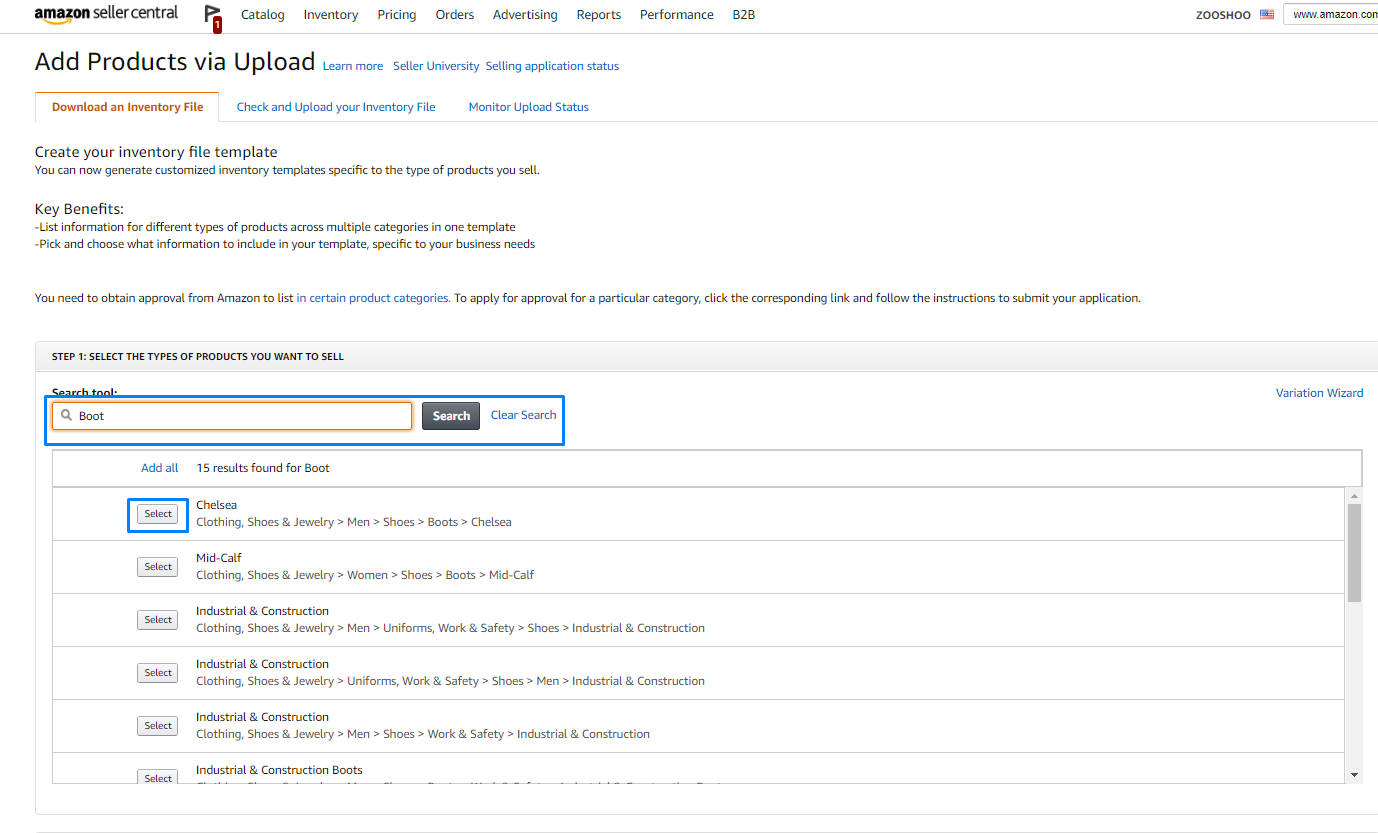
Choose the product category
Browse or search for the product category that best fits your items. Since this is the generic template, you can select a broad category or leave the selection at the universal option. The template will include the core fields common to all Amazon product listings such as SKU, title, price, and quantity.
Generate and download the template
Click the 'Generate Template' button to create the flat file. Amazon will prepare the file and provide a download link. Save the template to your computer. The file will be in Excel (.xlsx) or tab-delimited text format with headers on the first row and data entry instructions on additional tabs.
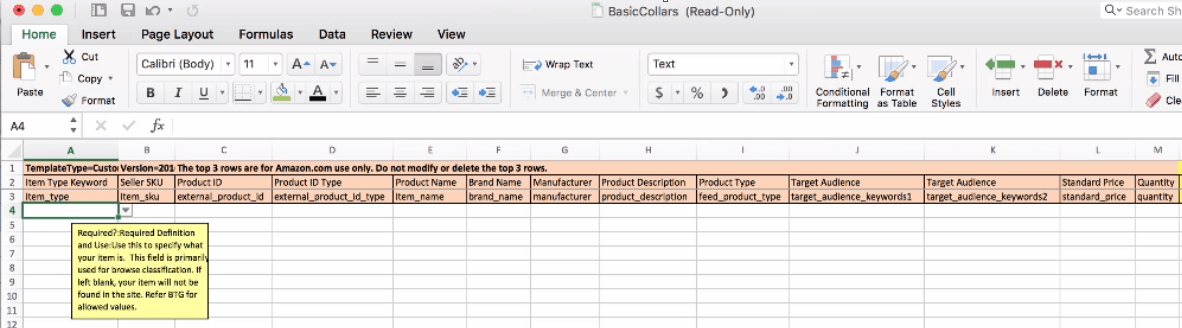
Open and review the template structure
Open the downloaded template in Microsoft Excel or a compatible spreadsheet application. Review the column headers on the 'Template' tab to understand the required and optional fields. The 'Data Definitions' or 'Instructions' tab provides detailed guidance on accepted values for each column.
Fill in your product data
Enter your product information row by row. At minimum, fill in the required fields: item_sku, item_name, brand_name, standard_price, and quantity. Add optional fields like product descriptions, bullet points, and image URLs to create more complete listings. Each row represents one product or product variation.
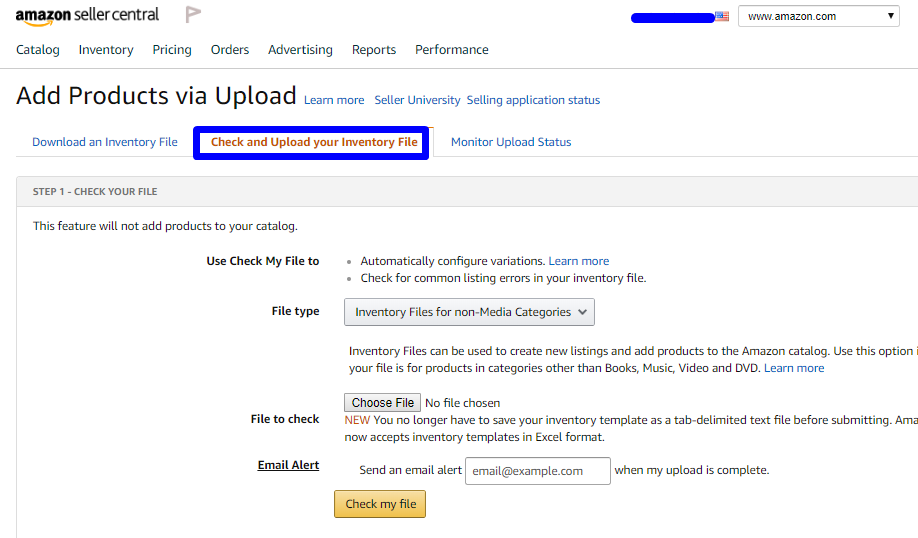
Save and upload the completed file
Save the completed file in the original format (tab-delimited text or .xlsx). Return to Seller Central and go to Inventory > Add Products via Upload > Upload your Inventory File. Select your file and click 'Upload'. Amazon will process the file and provide a processing report with any errors.
Required Flat File Generic Fields
| Field | Type | Description | Example |
|---|---|---|---|
| item_sku | Text | Seller's unique SKU identifier | PROD-001-BLK |
| item_name | Text | Product title (max 200 chars) | Premium Wireless Bluetooth Headphones |
| brand_name | Text | Brand name (must match Brand Registry if enrolled) | TechBrand |
| standard_price | Currency | Selling price | 49.99 |
| quantity | Number | Available stock quantity | 100 |
Your Amazon Seller export must include these fields for successful conversion.